/From Manual to Magical: Automating Your Repricer
From Manual to Magical: Automating Your Repricer
Ever feel like you’re sacrificing your sanity (and free time) just to keep your Amazon listings afloat? Picture this: You’re knee-deep in spreadsheets, second-guessing every price tweak, and praying you haven’t overlooked a fee that’s about to devour your profit margin.
What if you could reclaim your day by automating those mind-numbing tasks? With Aura, you can. In this post, we’ll show you how to streamline your entire repricing process—from importing costs to managing your listings’ lifecycle—so you can stop juggling tasks and start scaling your business.
Step 1: Importing Costs—No More Guesswork
The first step to effective repricing is accurate cost data, but costs don’t transfer over automatically when you connect your marketplace to Aura. And let’s be honest: manual entry is time-consuming and error-prone.
That’s why we’ve partnered with tools like ScanPower, RestockPro, InventoryLab, and Boxem to make managing your costs effortless. With a quick setup in Aura’s settings, these integrations will sync your cost data automatically.
Here’s what that means for you:
• Time Saved: No more digging through spreadsheets or manually inputting costs.
• Precision: Aura uses this data to calculate ROI, profit margins, and min/max prices accurately.
Automating cost imports means every new listing is ready to reprice accurately the moment it’s imported—giving you one less thing to worry about.
Step 2: Onboarding New Listings Without Lifting a Finger
Every new listing needs three things to start repricing effectively:
1. A minimum price (or cost, if you’re using auto-minimum pricing).
2. A strategy tailored to your goals.
3. Repricing enabled.
Sounds like a lot of clicking, right? But here’s the good news: Aura’s Workflows feature makes it all automatic.
With a New Listing Workflow, every listing imported into Aura from your marketplace gets a strategy assigned and repricing enabled—no manual intervention required. It’s like having a virtual assistant that handles new listings in real time.
How to Create a New Listing Workflow
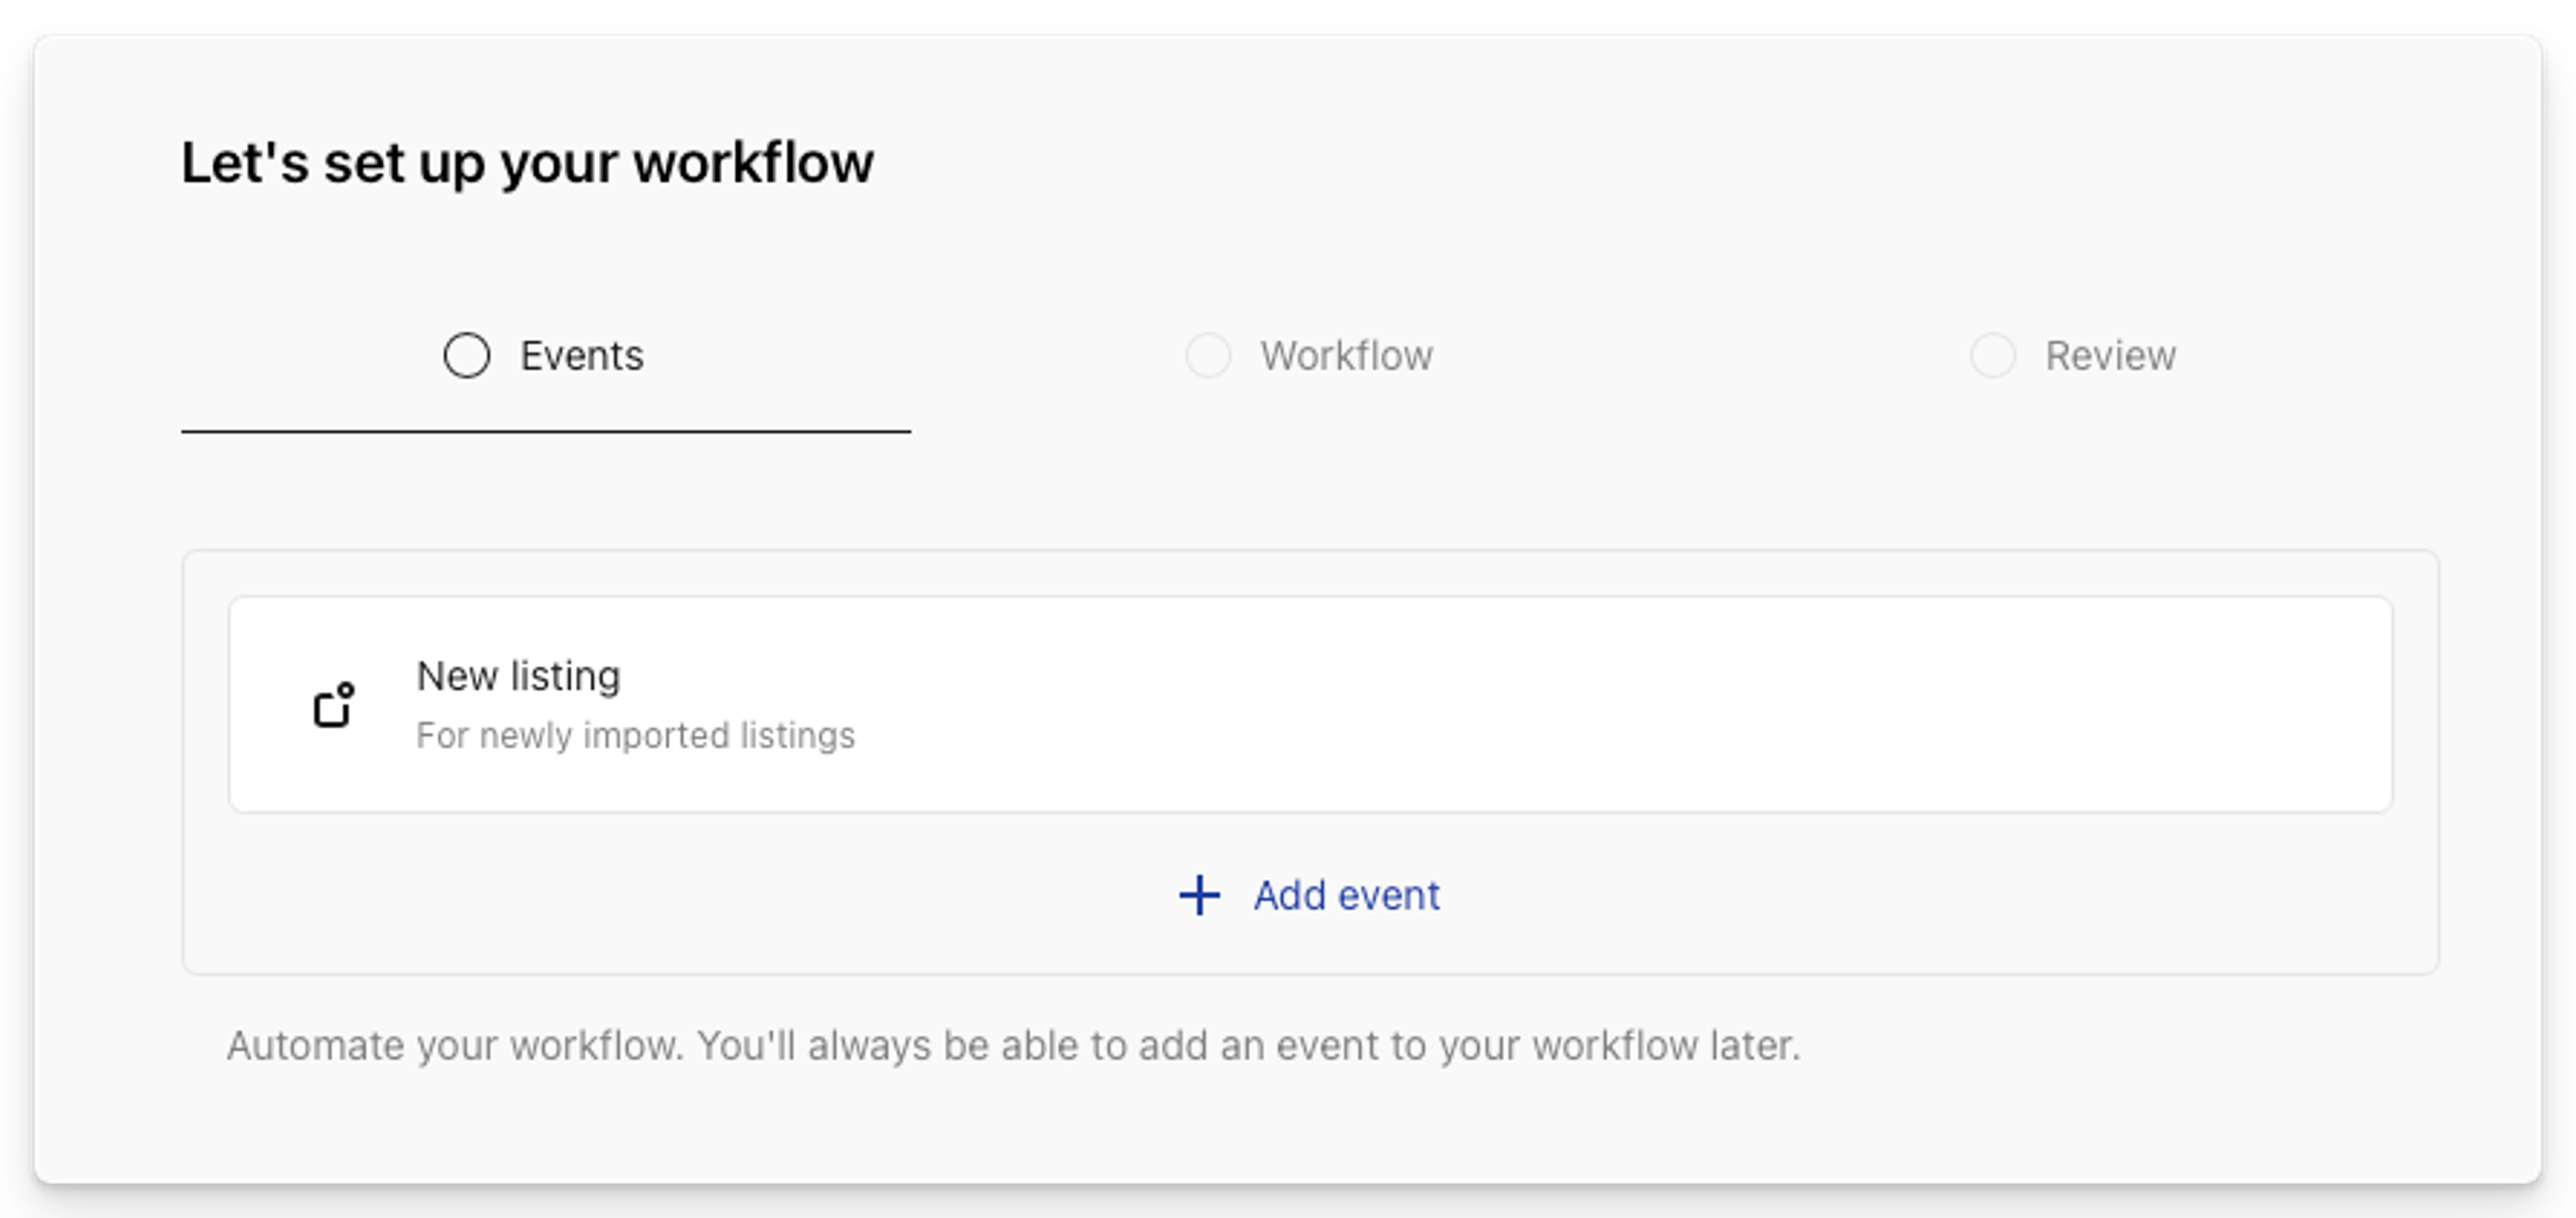
First, go to the Workflows feature in Aura, create a new Workflow, and choose New Listing as the Event trigger.
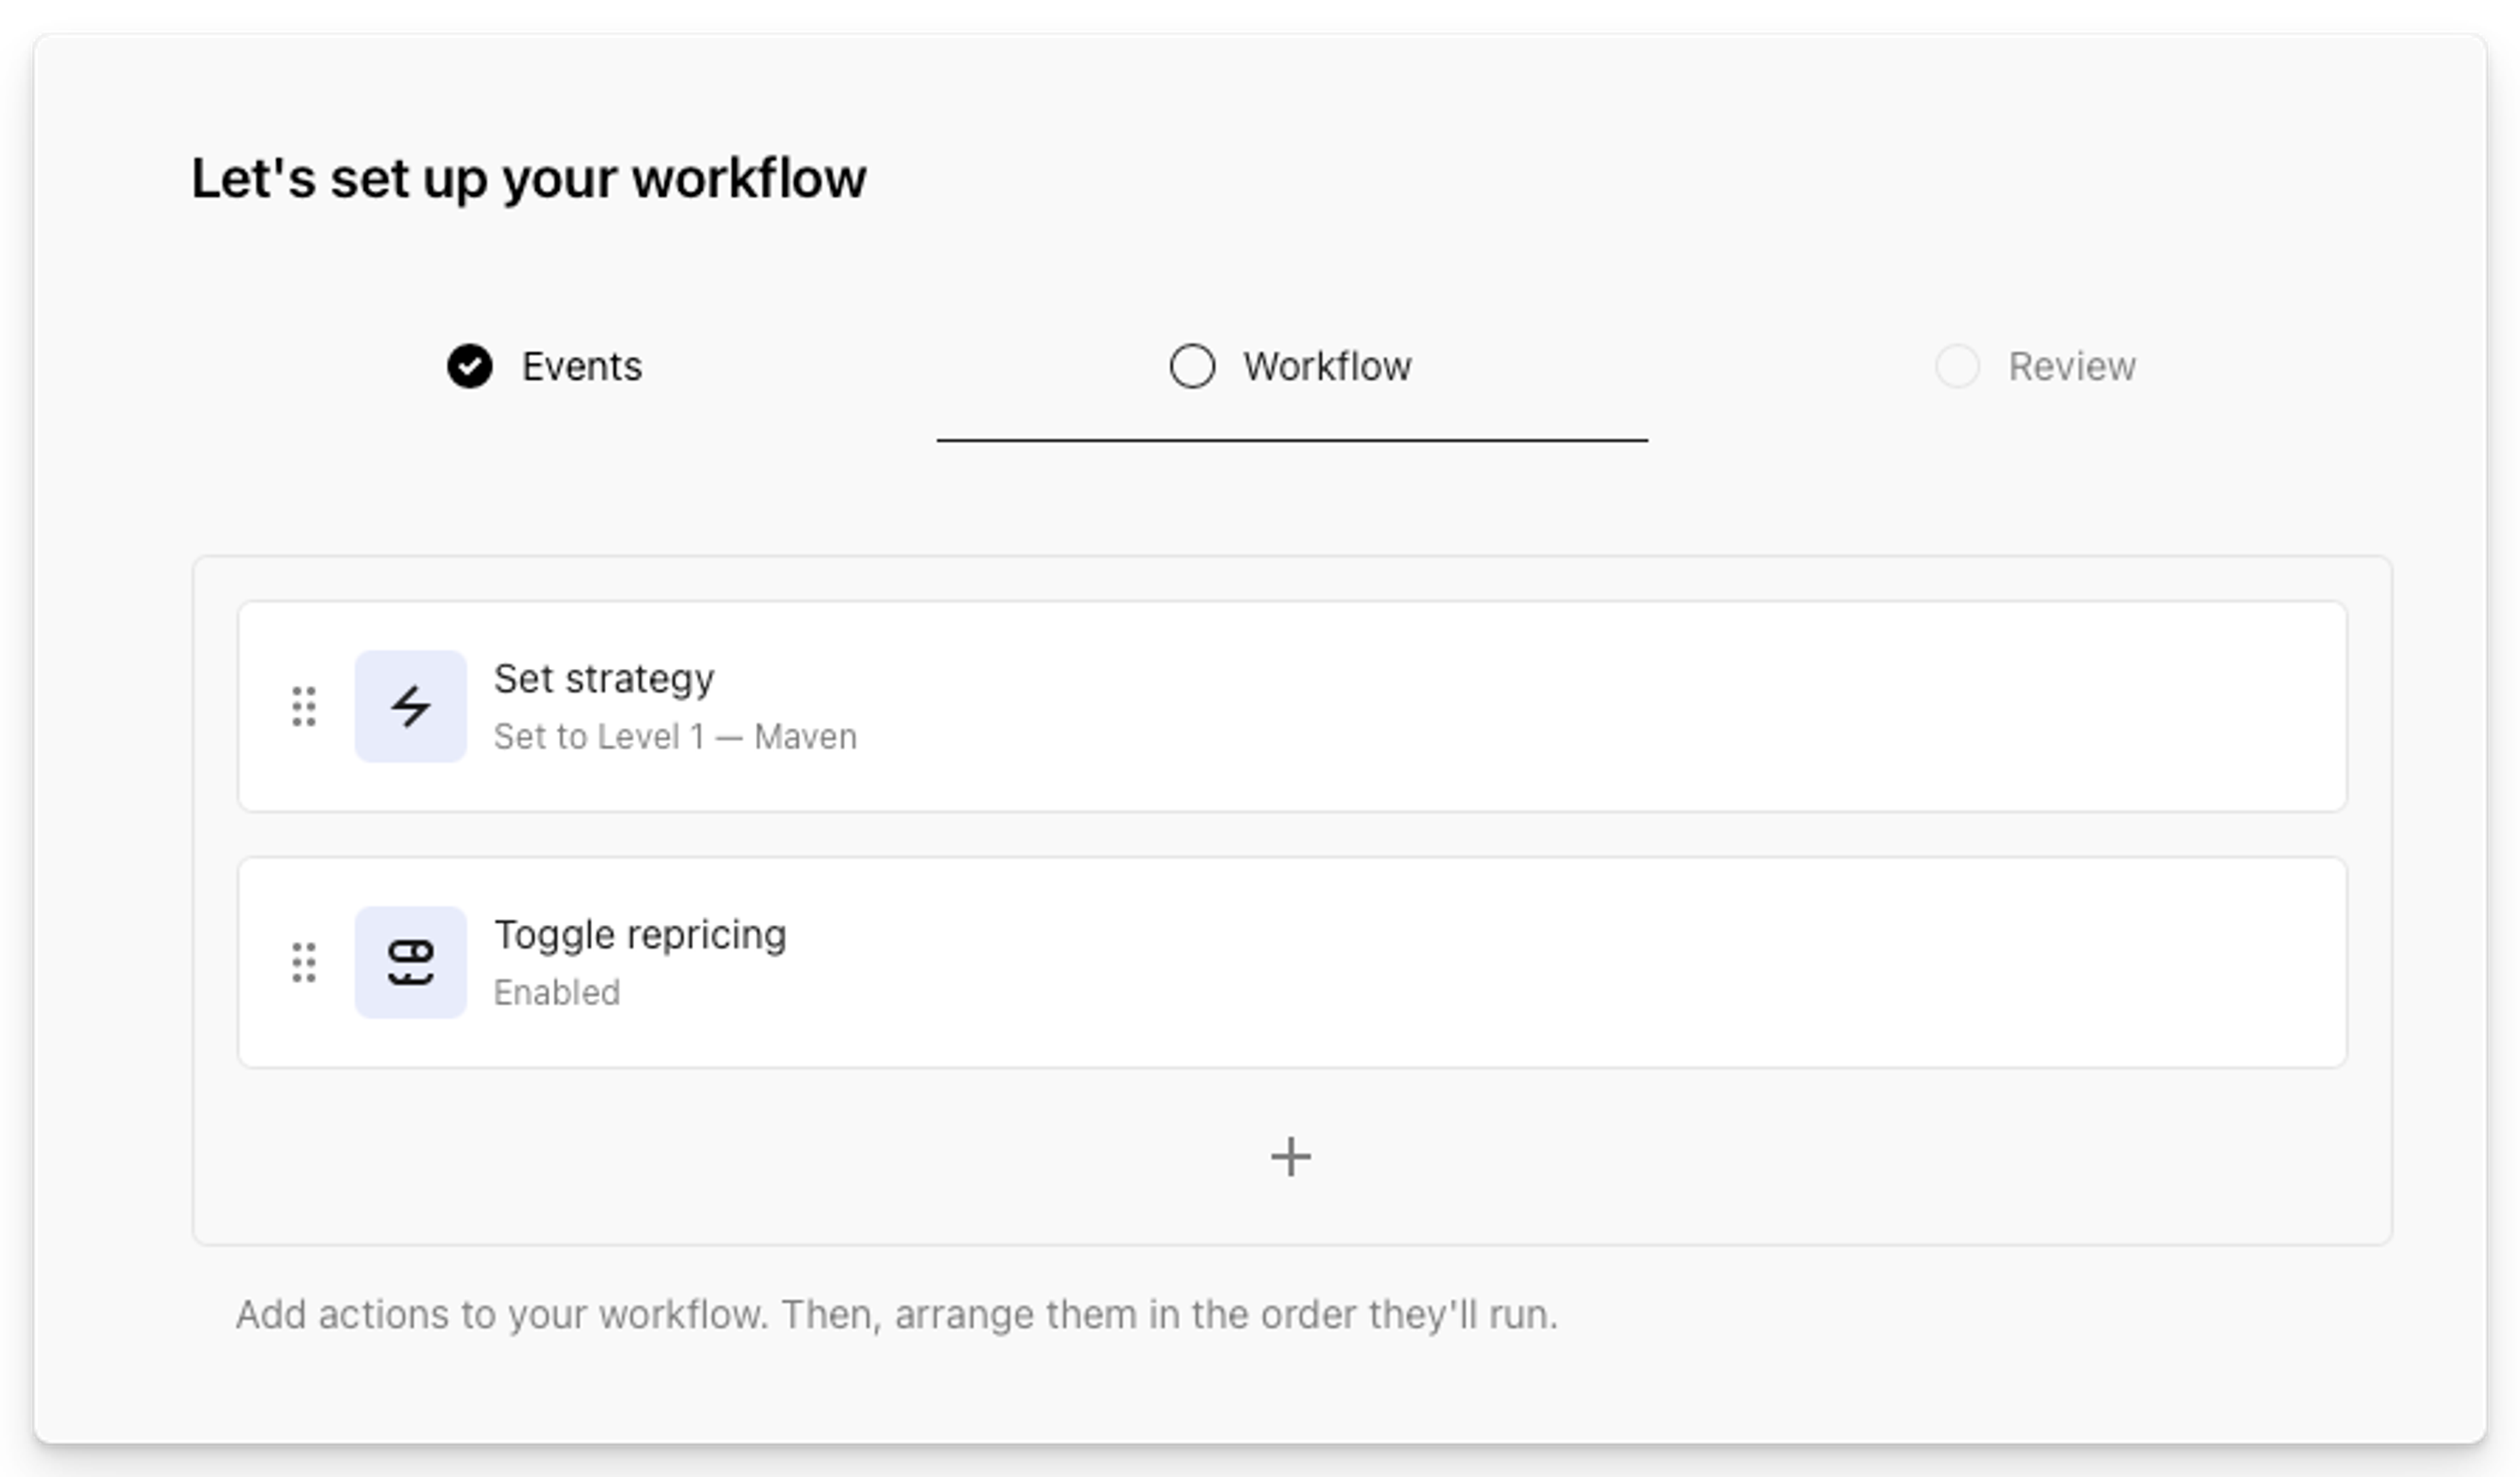
Last, add Set Strategy and Toggle repricing actions to the Workflow. Set these to your preferred strategy and set repricing to enabled.
Click save, name your Workflow, and you're all set!
Step 3: Automate the Entire Lifecycle—Because Time Is Money
Every listing goes through a natural lifecycle.
Early on, your focus is on profitability—pricing conservatively to maximize every sale. As time passes, the urgency to sell increases. Long-term storage fees loom, and your goal shifts to reclaiming capital by moving inventory faster.
This progression can be broken into three key stages:
1. Early Stage: Prioritize profitability with balanced pricing.
2. Mid Stage: Shift to more competitive pricing to drive sales.
3. Late Stage: Use aggressive pricing to clear inventory and recover capital.
Aura simplifies managing this lifecycle with three core strategies, each tailored to a specific stage:
• Maven (Balanced): Start with Maven, Aura’s AI-powered strategy, to balance profitability and sales velocity. It’s ideal for new or low-urgency inventory, as it dynamically calculates the Optimal Price for each listing.
• Buy Box Targeting (Competitive): When it’s time to compete more aggressively, switch to this rule-based strategy. It focuses on winning the Buy Box by pricing slightly below, at, or above the current winner, depending on your goals.
• Liquidation (Aggressive): For aging inventory, profitability takes a backseat to speed. This strategy uses aggressive pricing—often at or near breakeven—to clear out inventory quickly and free up capital.
Manually managing these transitions isn’t just time-consuming—it could be costing you money. That’s where Aura’s Age of Inventory Workflow comes in.
Let Aura Handle the Heavy Lifting
Instead of constantly monitoring and adjusting strategies yourself, our Age of Inventory Workflow automates the process.
Here’s how it works:
1. Aura regularly checks your inventory for listings that meet your criteria—like items that have been sitting for 30 days or longer.
2. When a listing ages into a new stage, the Workflow automatically assigns it the appropriate strategy.
3.New listings start with Maven, but as they age, they transition to Buy Box Targeting or Liquidation, depending on your preferences.
This system ensures your listings always have the right pricing strategy at the right time, without you needing to lift a finger.
How to Create an Age of Inventory Workflow
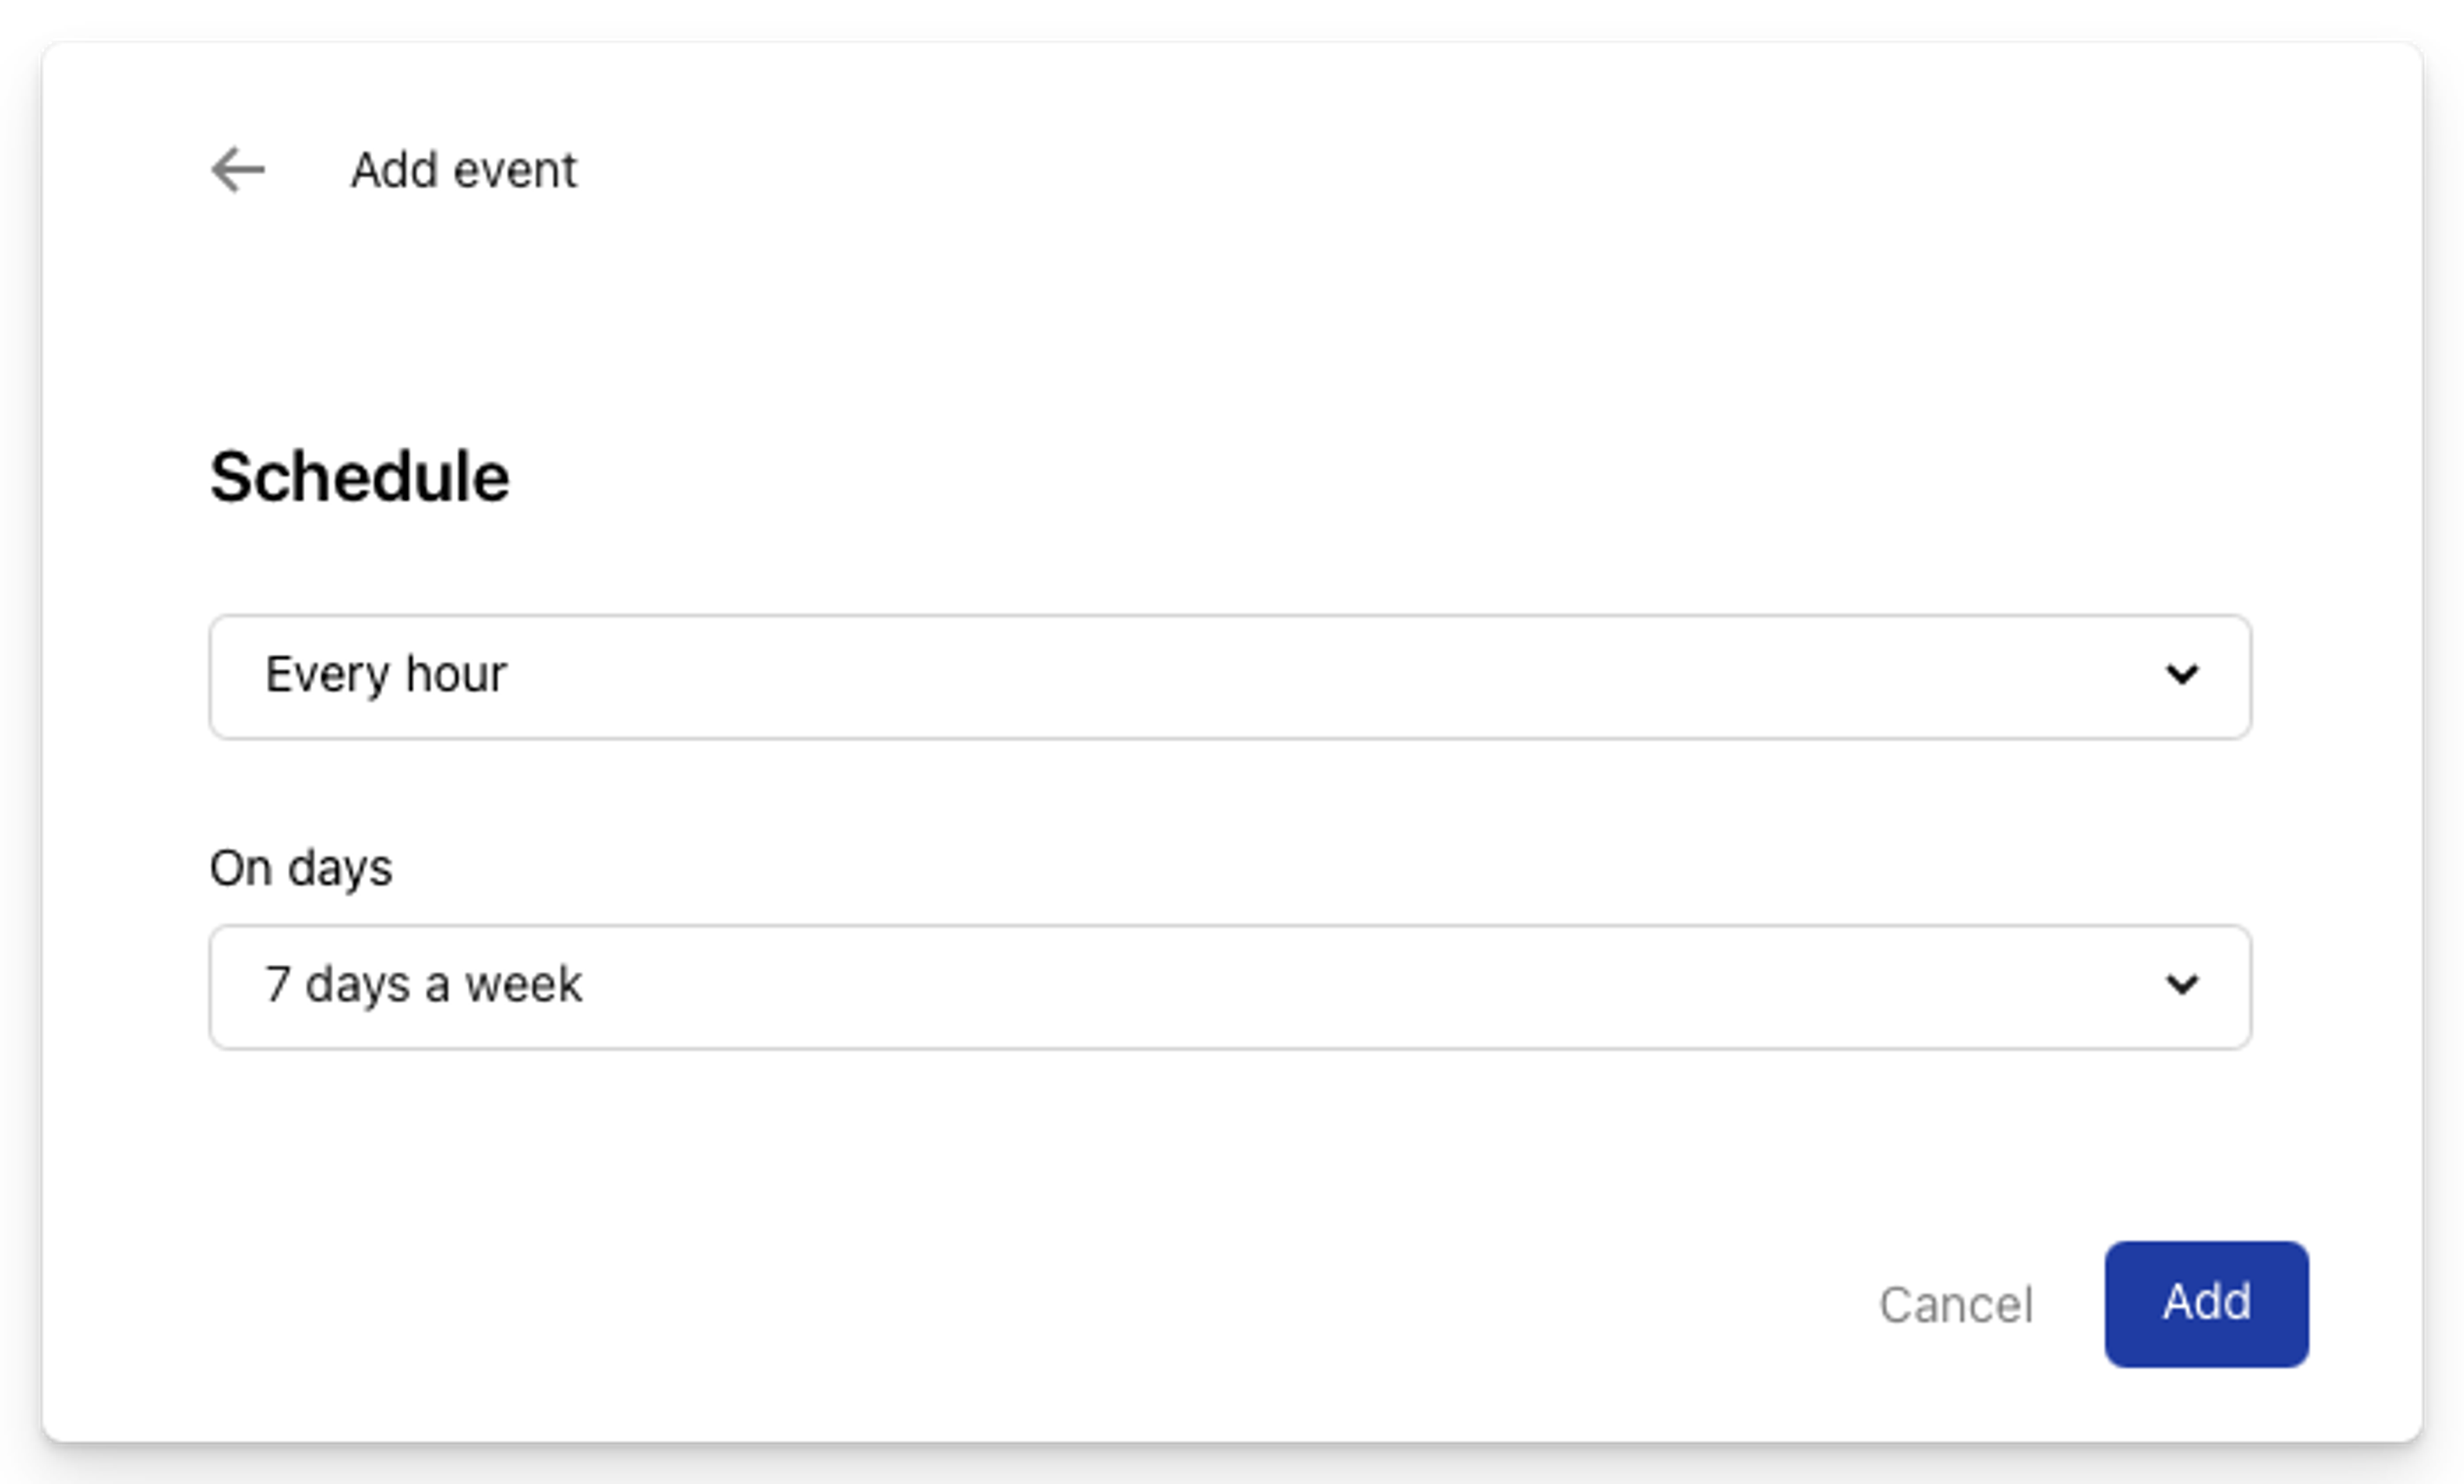
First, create a new Workflow that triggers on a schedule (e.g., Every hour)
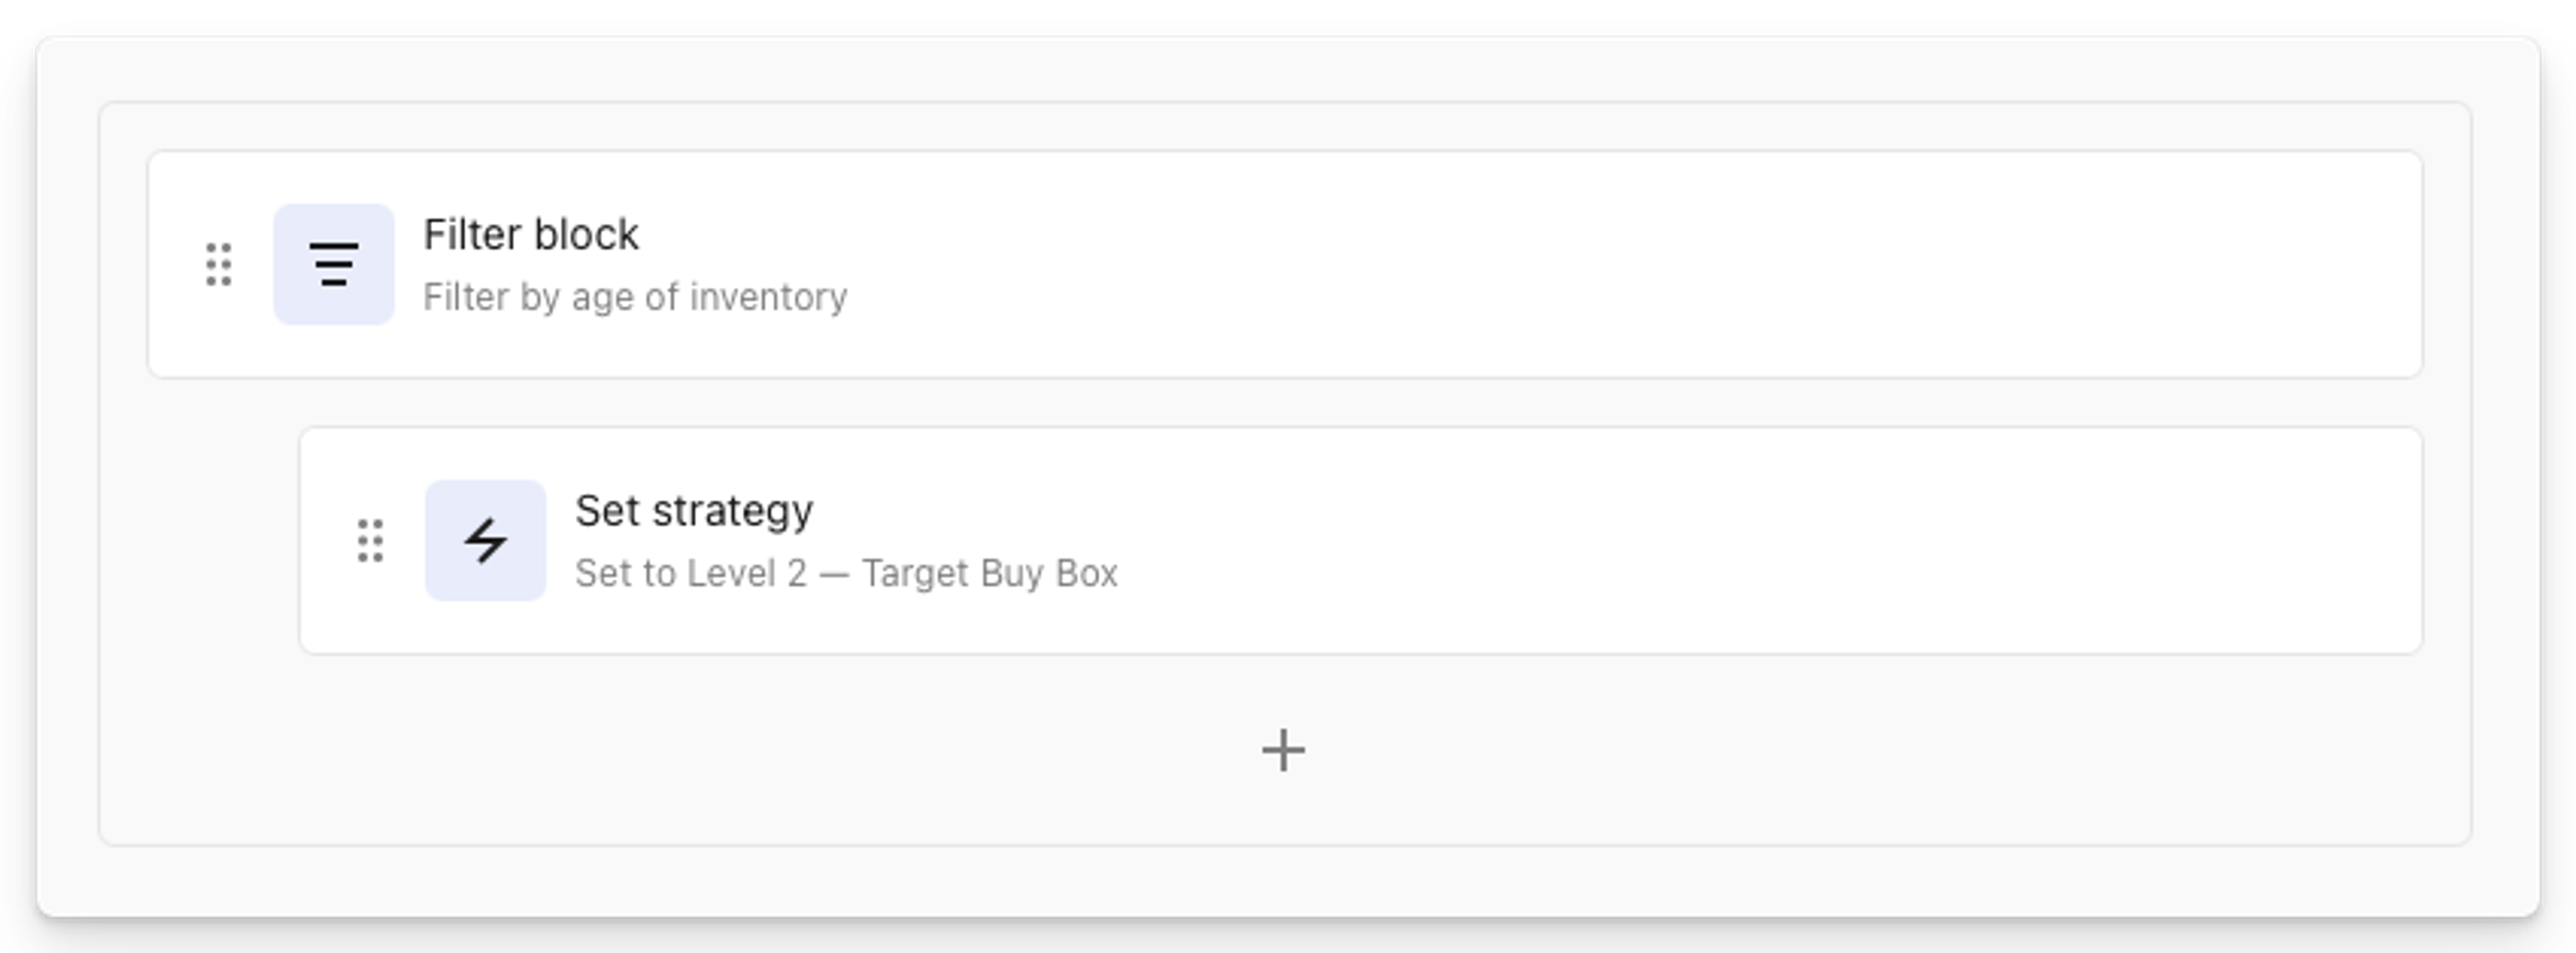
Next, add a Filter block and choose Filter by age of inventory. You can then set your criteria––for example, if you have more than 1 unit aged over 30 days.

You can set your criteria using either number of units or a percentage of inventory.
Lastly, add the Set strategy action and choose which strategy these listings should update to (e.g., a more aggressive strategy). Just make sure that it's nested as is shown below.
A Smarter, Simpler Approach
With Aura’s automation workflows, you’re not just saving time—you’re gaining control. Your inventory progresses through its lifecycle like clockwork, maximizing early profits, driving mid-stage sales, and clearing out aging inventory efficiently.
The result? Less stress, fewer errors, and more time to focus on scaling your business.
Ready to go from Manual to Magical?
Ready to stop juggling tasks and start scaling your Amazon business with confidence? Log in to Aura today and set up your first Workflow—or start your free trial to see how automation can transform your operations!


