/Step-by-Step Guide for Fulfilling Shipment To Amazon FBA
Step-by-Step Guide for Fulfilling Shipment To Amazon FBA
The process for shipment to Amazon FBA can be quite tedious and convoluted. Because of this, we have provided you an in-depth step-by-step guide to answer any questions you may have as you progress on your Amazon journey.
The case to switch from FBM to FBA is quite clear. FBA is the preferred method for Amazon shoppers as customers love utilizing the perks that come with their Prime membership. As a result, sellers who use FBA usually experience increased sales, shipping cost savings, and automated customer service and return management.
As you will learn, there are some tricks to the trade. These tricks will help you save time, money, and more importantly frustration.
Create a Shipment Plan
Add Your Products and Send/Replenish Inventory
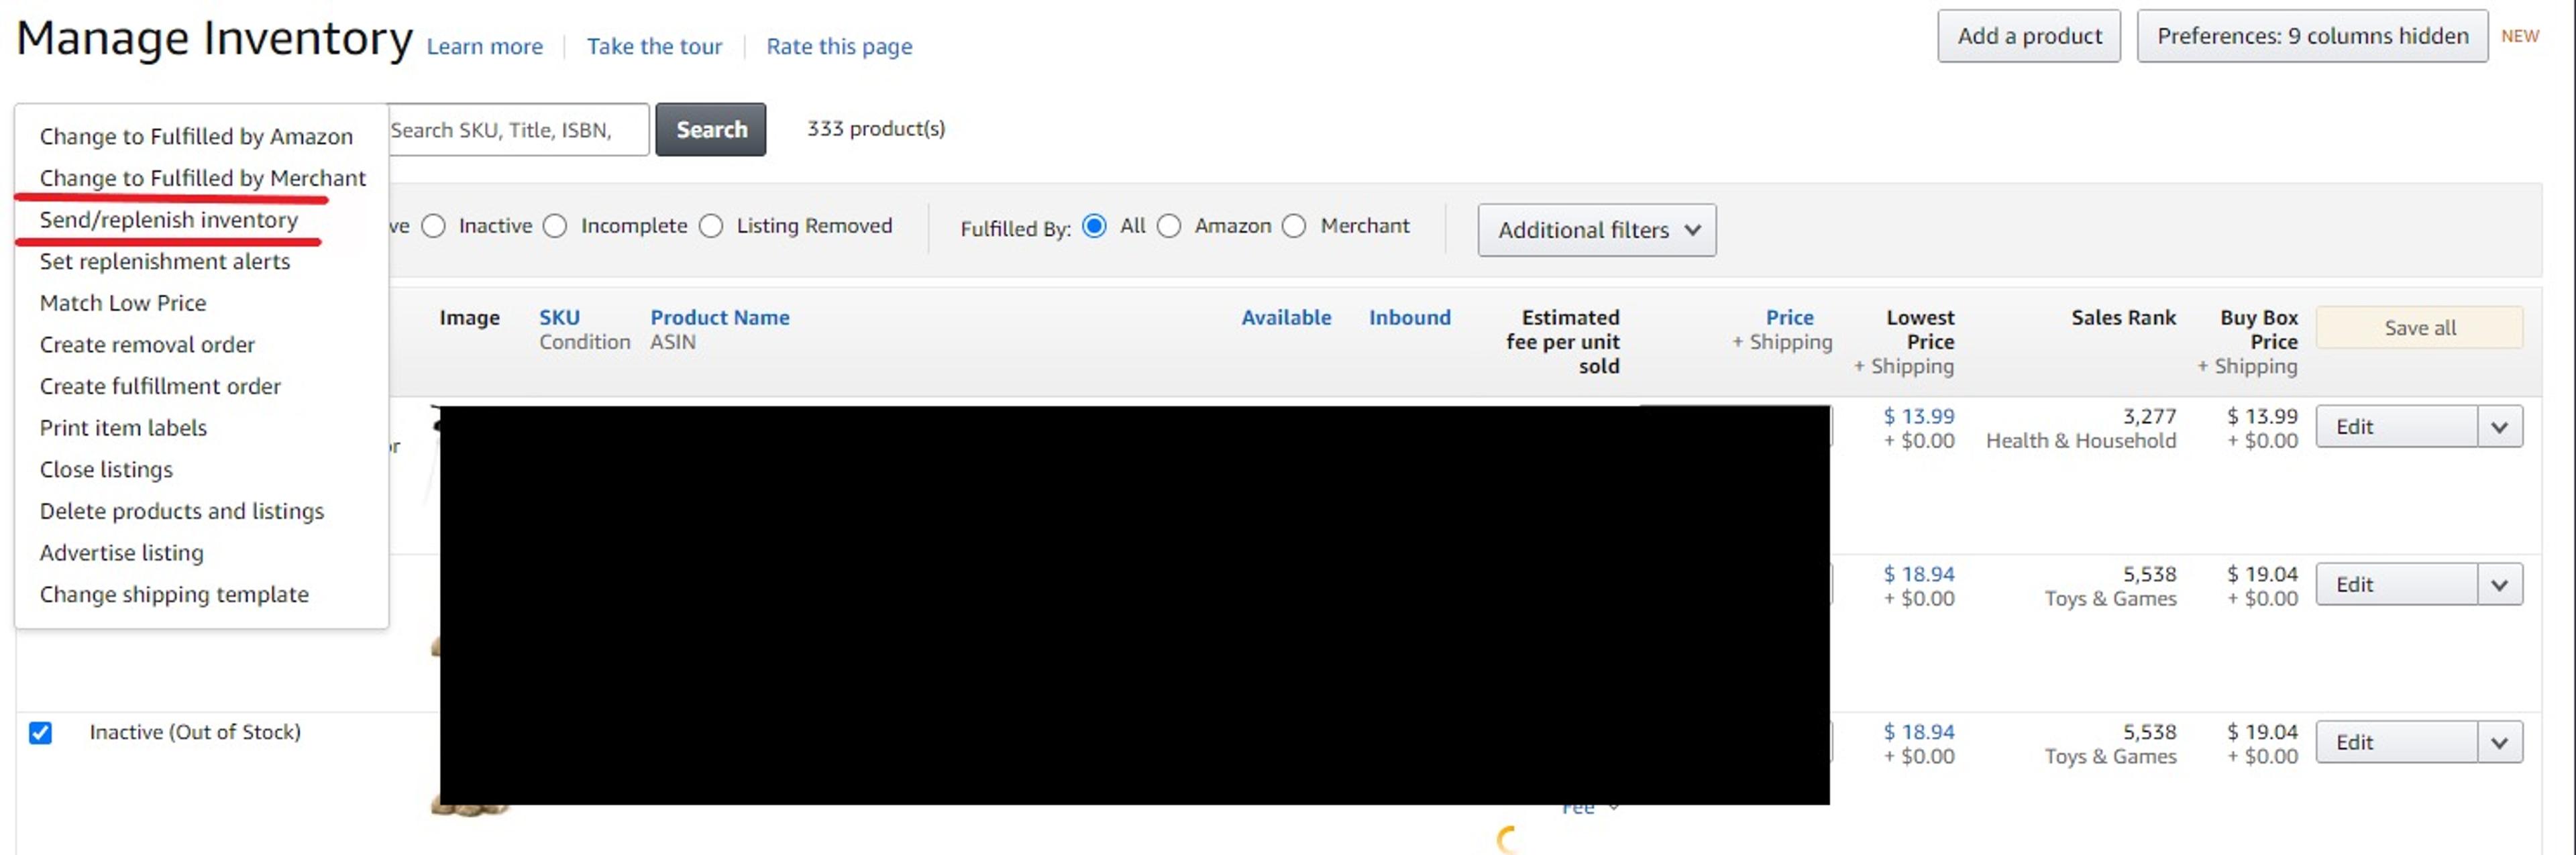
The first step for shipment to Amazon FBA is to start a shipment plan. This is done by going to Inventory → Manage Inventory. Once you are there, select “Add a product.”
Once you have found the product, fill out the price and other information. Afterward, submit the listing. Go ahead and rinse and repeat the process until all the products in your batch have been submitted.
If you are selling as an Arbitrageur or Wholesaler there should already be a listing available to add. However, If you are selling a new Private Label product there will not be an existing listing for you. You will have to create one from scratch.
Now go to the Manage Inventory Page. You will see all the products you have added as well as any product you may have listed previously.
Select the checkbox on all the products you plan to ship to Amazon FBA. Once all checked, select the “Send/Replenish Inventory” button from the drop-down menu.
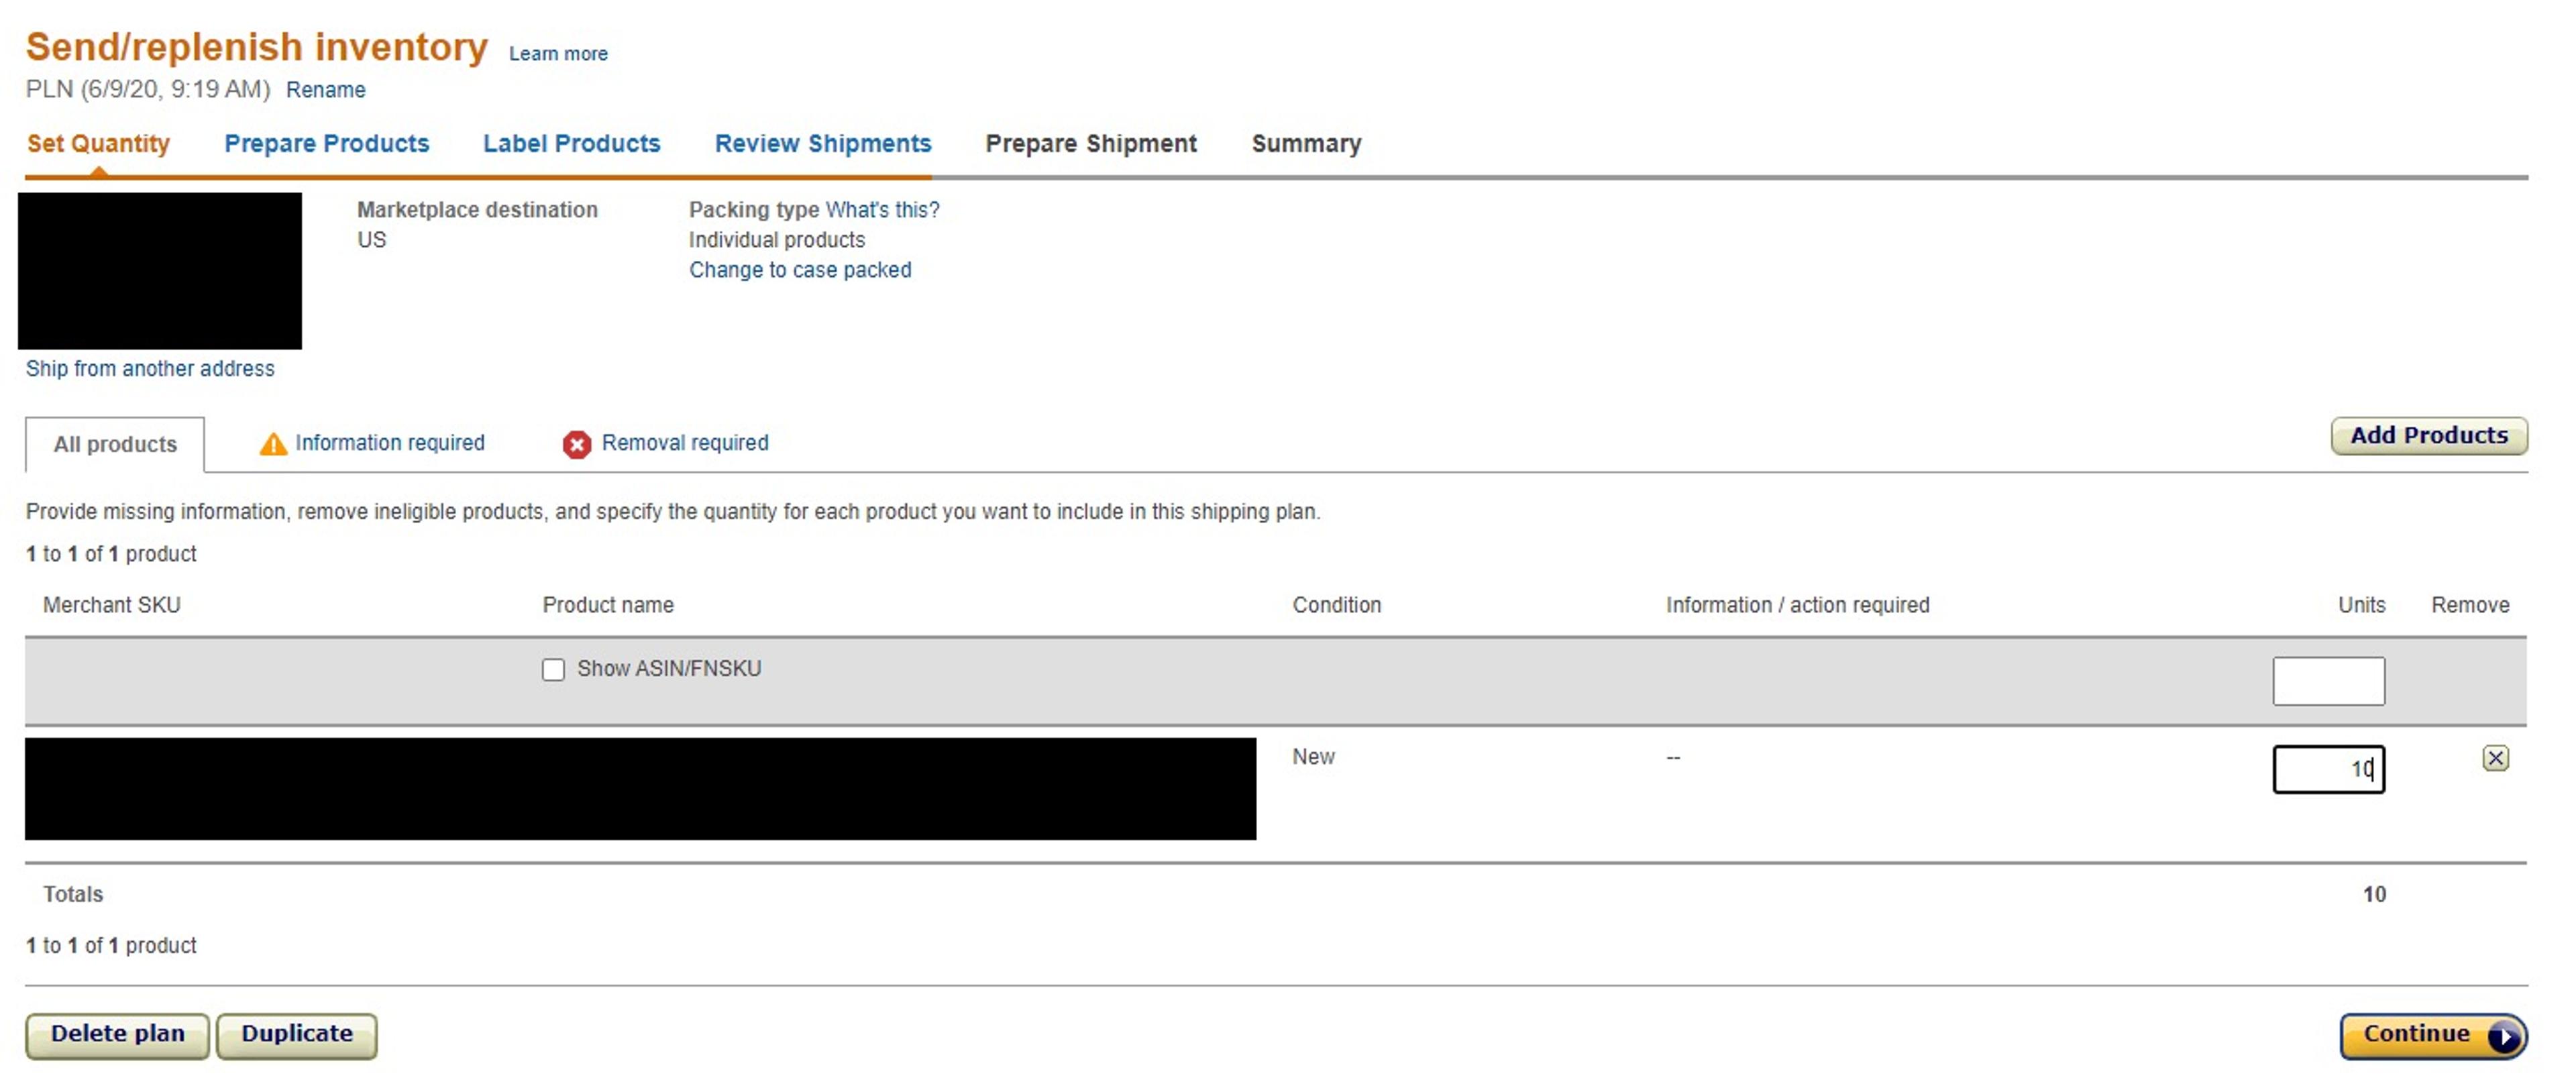
Set Quantity
“Set Quantity” is the first of six steps to successfully fulfilling your Amazon FBA shipment plan.
First confirm the “Ship from” address in the top left corner, adjust if necessary. Remember if your manufacturer is sending the products directly from their warehouse to Amazon you must change the “ship from address” to their address.
Package Type
Next, Identity packaging type. Most private labelers and wholesalers will select Case-packed products meanwhile arbitrage sellers will select Individual Products.
Case-Packed Products: All the products in the package are identical items in the same condition
Individual Products: Several different types of products in the box

Lastly, go through all the selected listings and confirm the quantity of each product.
Required Tasks
Depending on the products you are selling, Amazon may ask you for additional information under action required.
Amazon could also ask you several questions; especially whenever selling a product that includes a battery. An easy place to find all the information needed is in the listing. It will be found in the specification section of the product description.
Prepare The Products
Amazon stresses quality control when it comes to shipping. They are not afraid to turn away merchandise that has minor damage to the packaging. To ensure the products do not get damaged in their course, Amazon requires certain standards for shipment to Amazon FBA warehouses.
These standards Amazon impose may require certain packing materials when sending inventory to FBA. However, if you chose not to you may opt to have Amazon prep your packages at a cost. If you chose to Prep the products yourself, select “Merchant” where it asks “Who Preps?”
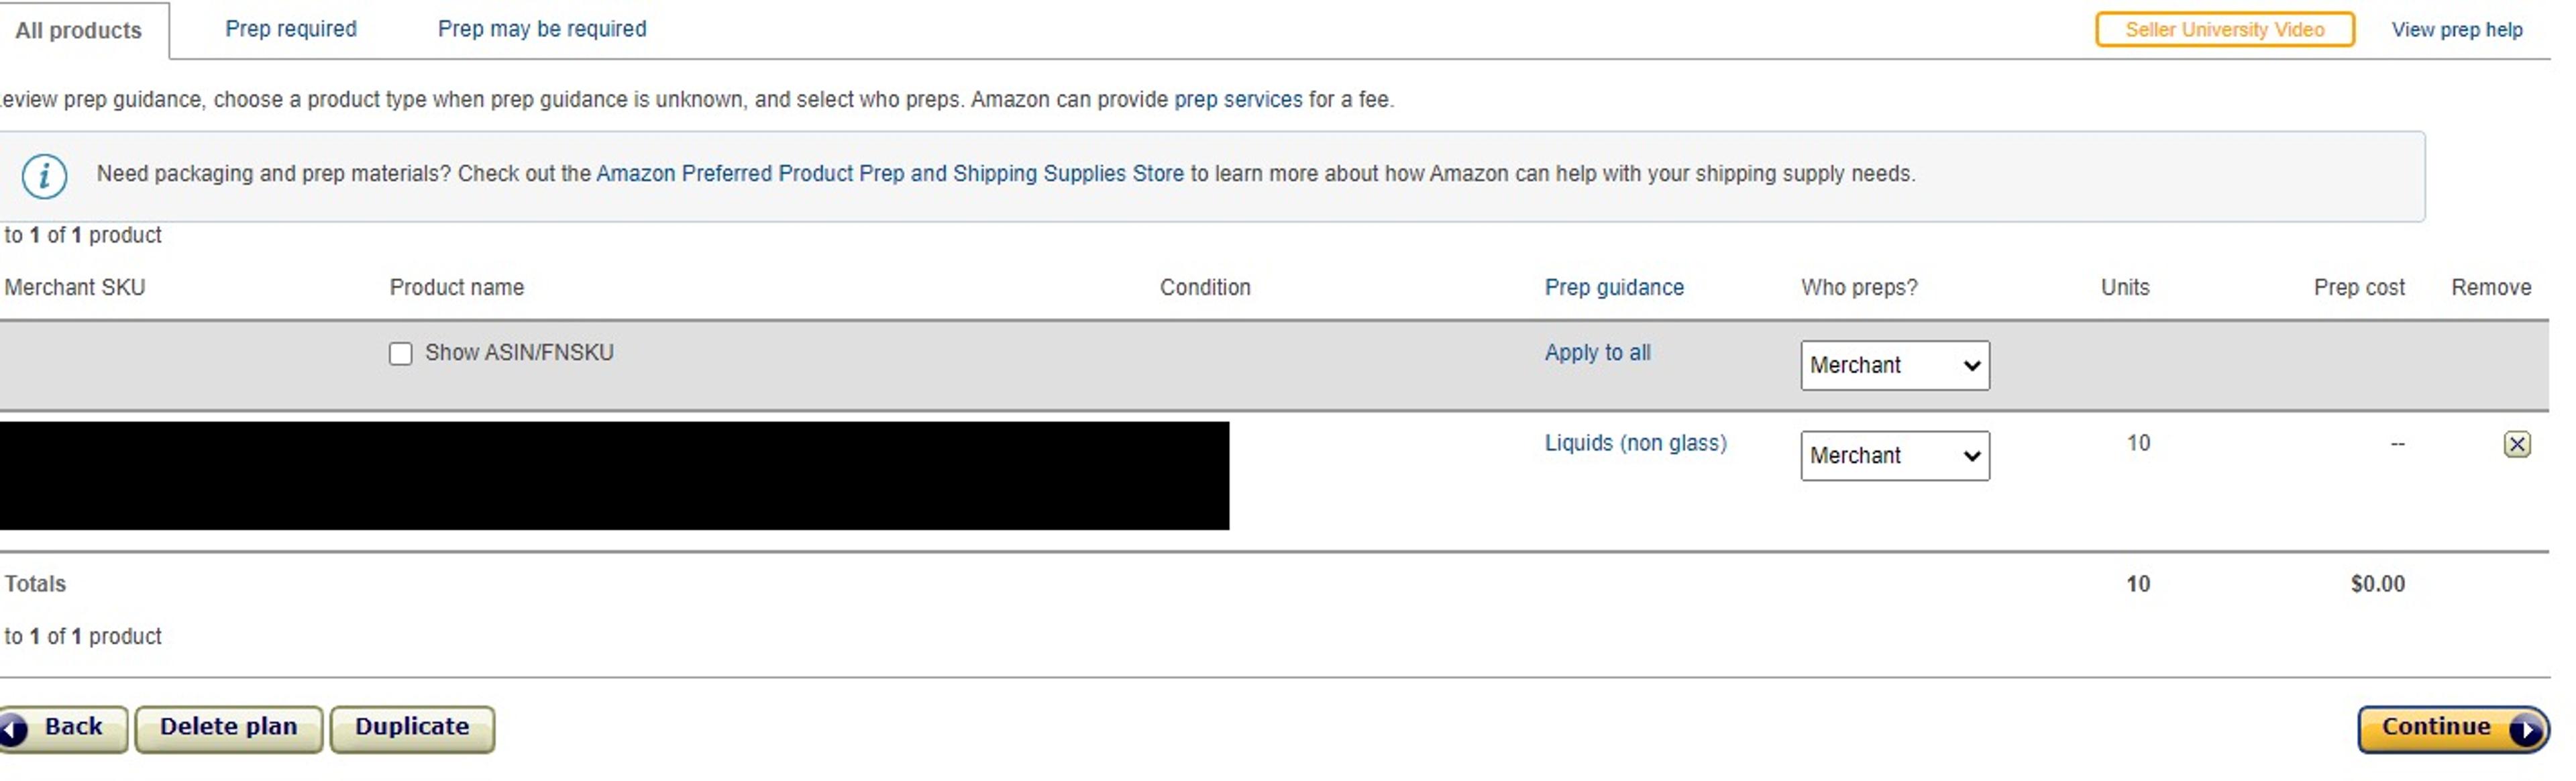
Something to note: Amazon will only prep products with an active UPC
The Prep required tab on the Prepare Products page will indicate whenever there are packing requirements you must follow. These required materials may include:
- Bubble wrap
- Polybags
- Tape
- Opaque bags
For more information on packaging and prep requirements as well as the cost of Amazon Prep services, you may visit the seller central post here. If your product lacks requirements, it is still important to protect your products. A list of prep protocol separated by category may be found here.
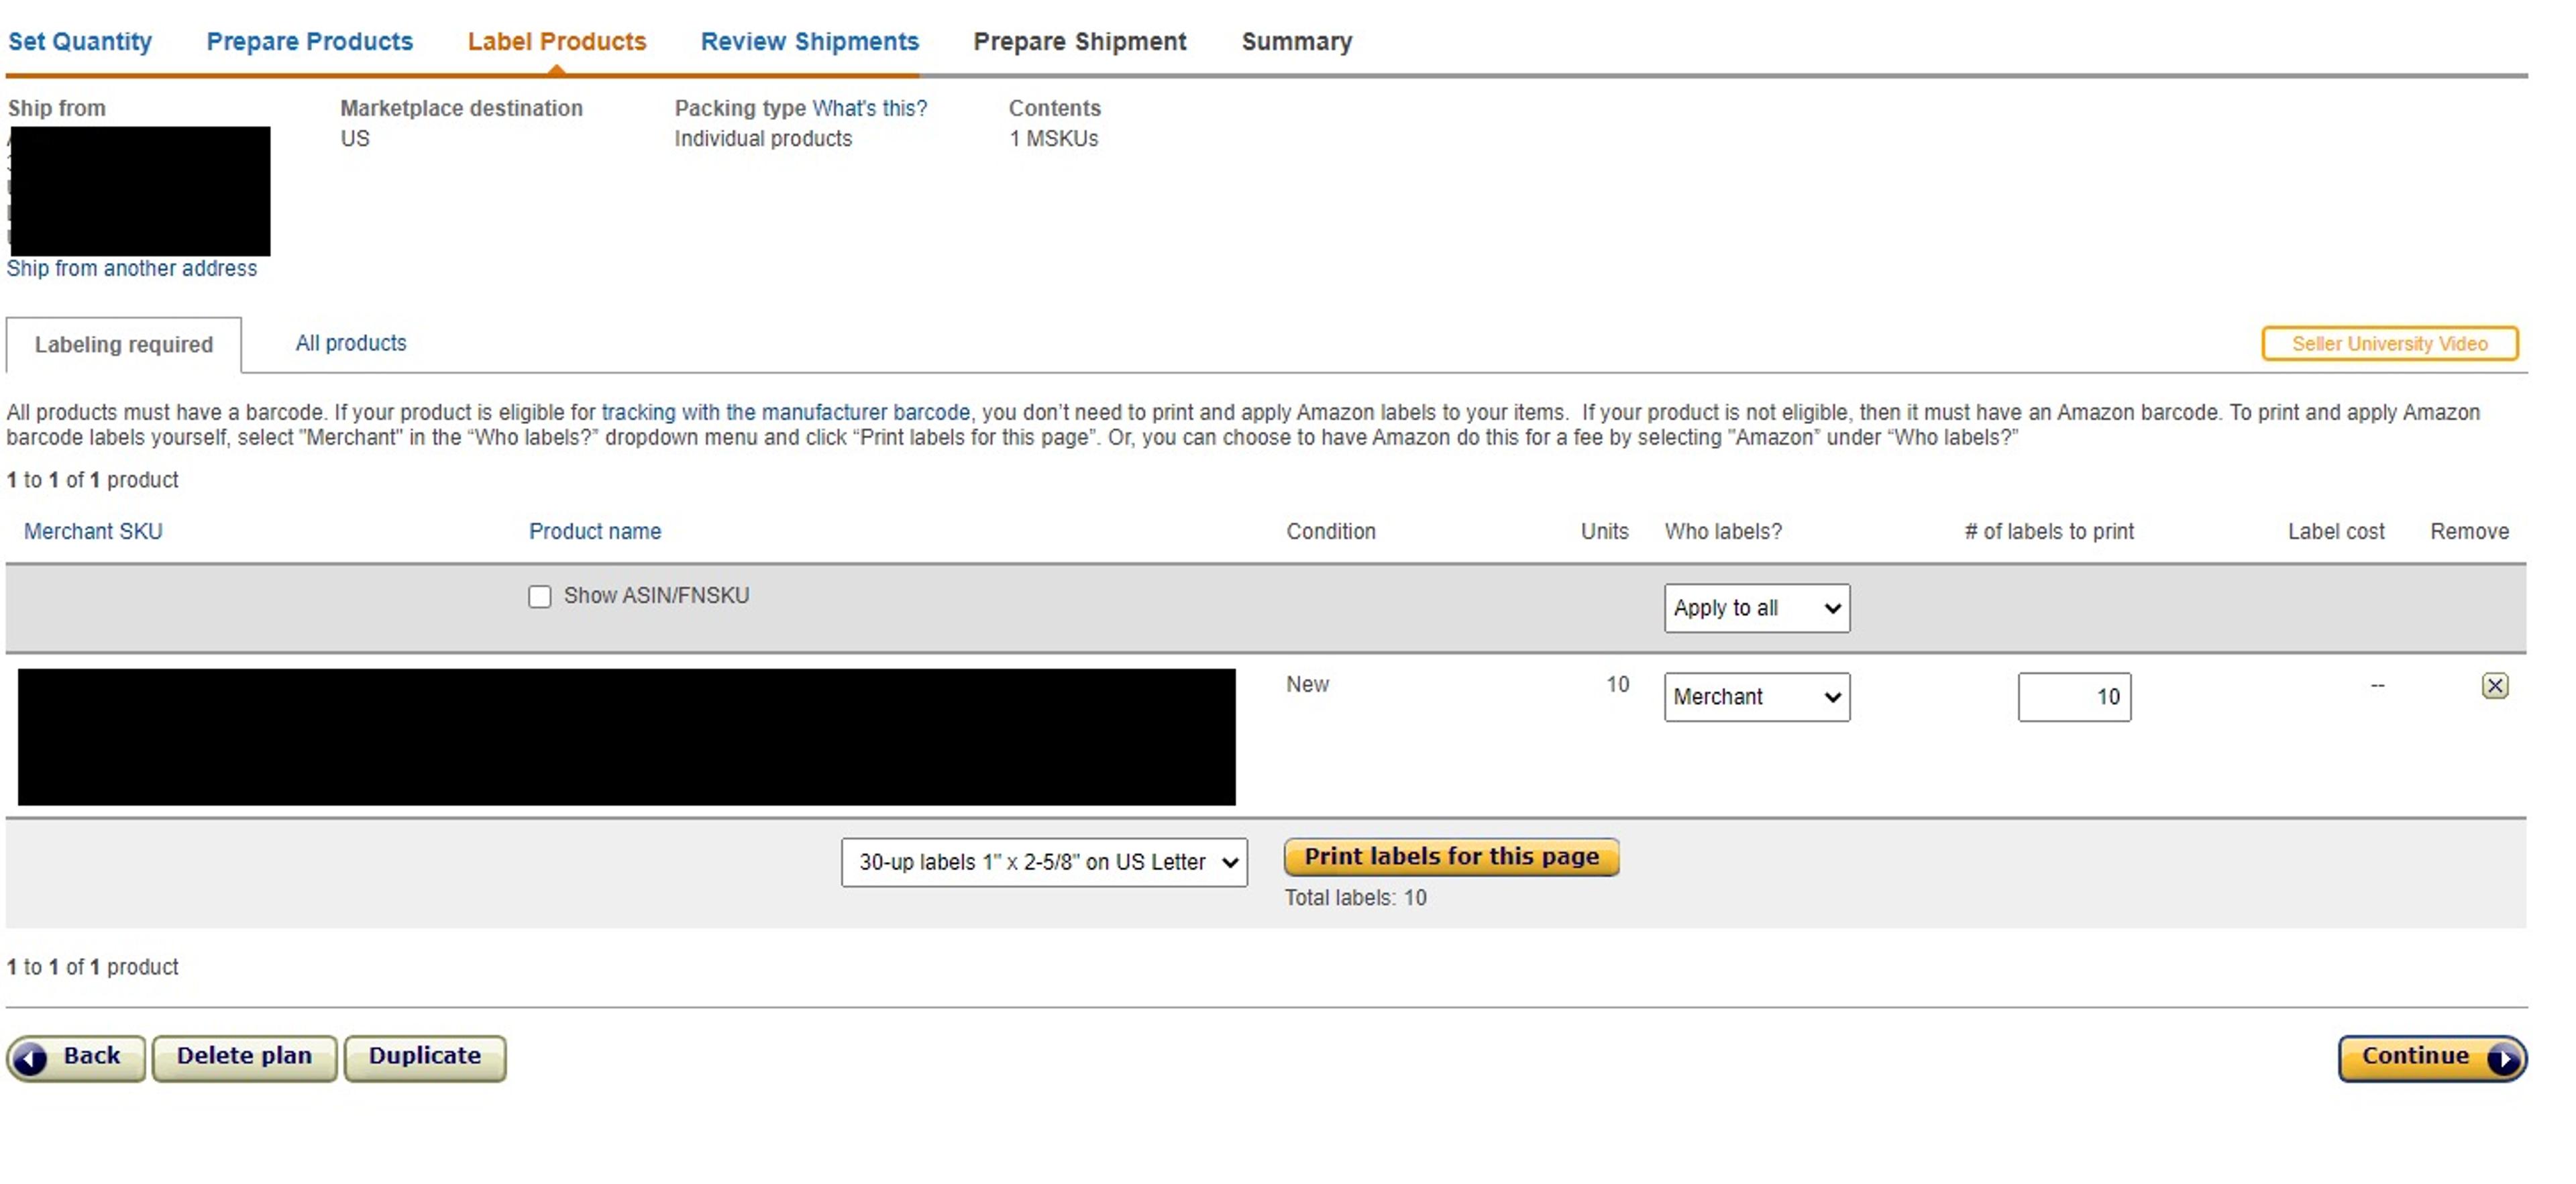
Label The Products
Amazon utilizes a barcode system in order to keep track of incoming and outgoing packages. If you do not follow their system, you may risk losing your products within the Amazon supply-chain.
Your product may already have an already existing, eligible UPC or EAN barcode. However, if not eligible you must print out and add an Amazon barcode directly to each product.
You may opt to have Amazon label your products for you with a barcode at an extra charger, however, I advise against it. (around 30 cents per product)
I have heard anecdotes of Amazon misplacing unlabeled products and not being found for weeks. Not only do you mitigate the risk of lost products but you also increase cost savings that quickly add up by just labeling yourself.
The Labeling Required tab will notify you of any products that require printed labels. To opt to label yourself, under “Who Labels?” select “Merchant.”
Review Your Shipment
This page is very important as it’s the last chance to go back and make any last-minute changes. After this point, you will have a limited ability to make changes to quantities and other variables you selected.
Review shipments tab will display the MSKUs and the Amazon fulfillment center, if not multiple. These will be the different FBA warehouses you will be shipping your inventory to.
I recommend clicking on “View Shipment Contents” and print it out as a packing list. It will help with physically preparing the boxes if you are shipping in large quantities.
After carefully reviewing your shipment, click approve shipments. Now you are ready to work on your shipment.
At this point, any FBM listings of these products will become inactive. As soon as the shipment arrives, Amazon will mark your listing active again under FBA.
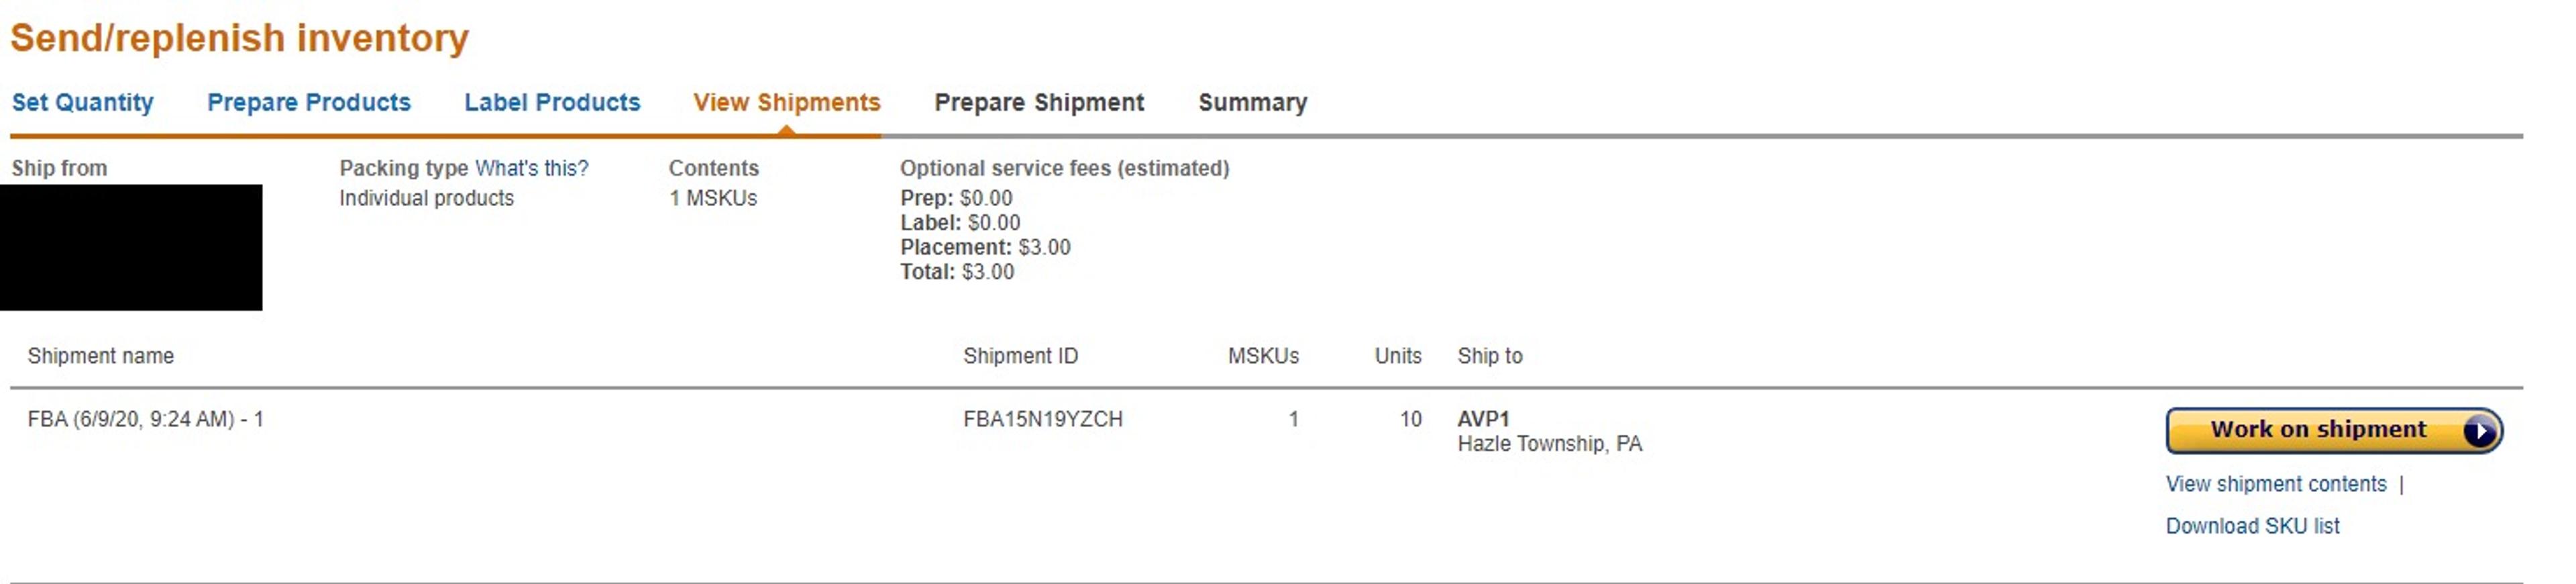
Prepare Your Shipment
Now you are ready to begin physically preparing your shipment. Next print out the new labels you need.
Review shipment contents
To access your labels and print them, select “work on shipment.” Then under the first section of the Prepare Shipment page, click on “Review and modify units.” Scroll down and you will then see the option to “Print Labels for this page.” If all your products were eligible with active UPC codes then you would be able to skip this step.
Be sure to:
- Stick the new Amazon labels over any existing barcodes in order to reduce misreads.
- Scrape off any preexisting labels
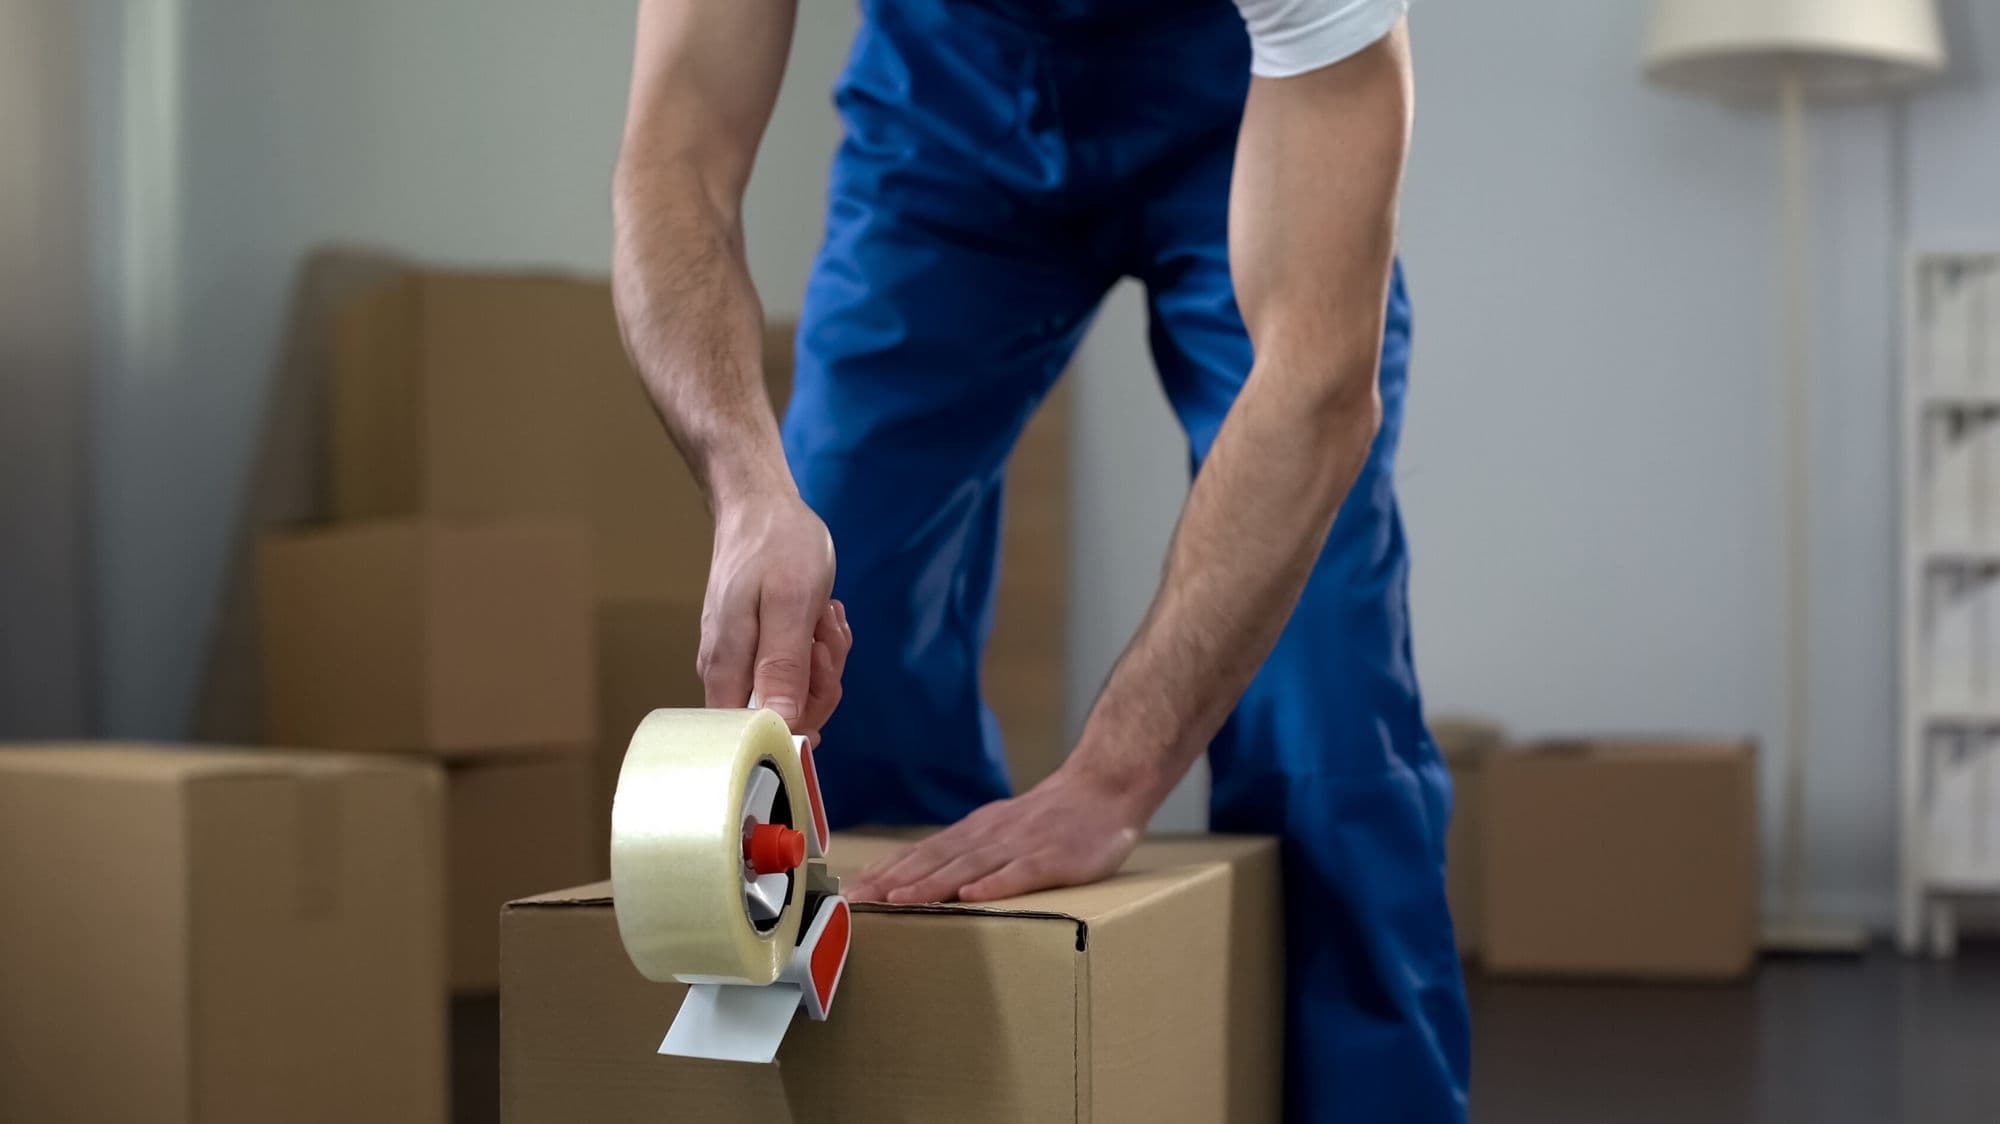
Assuming now all your products are properly scannable, now you may pack your products inside boxes.
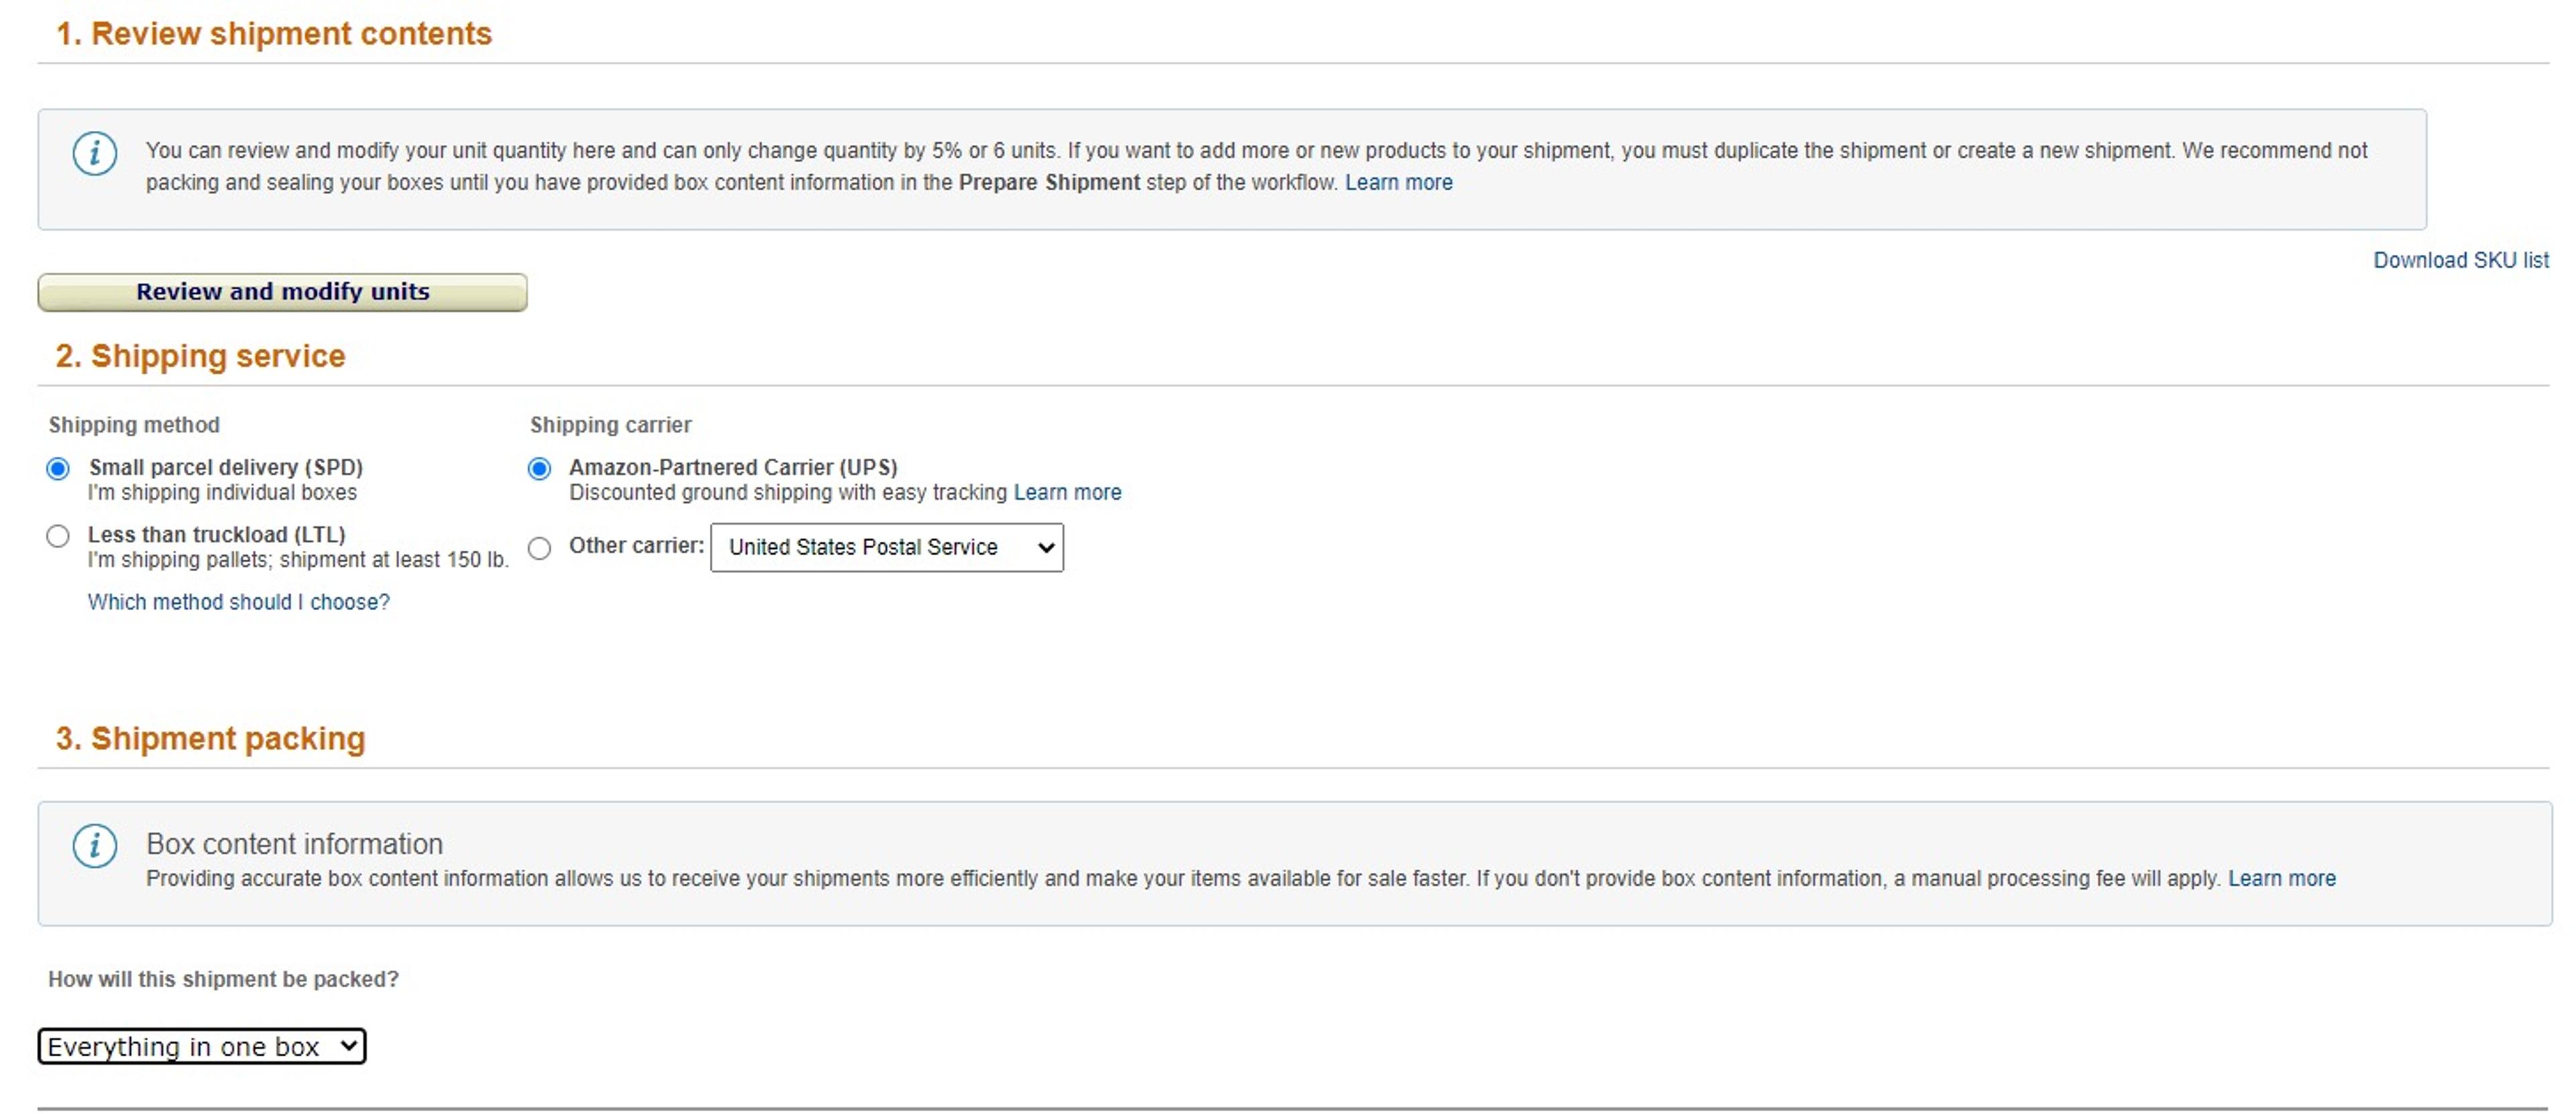
Select Shipping Service
Shipping Method
Presumably, if you are reading this then you will be shipping SPD, small parcel delivery. LTL is only more sellers who ship their products in large quantities on pallets.
Shipping Carrier
Select the shipping carrier you chose to use. I highly recommend using the Amazon Partnered carrier as you will receive deeply discounted shipping rates.
There is a 1lb (0.45 kg) minimum charge billed for shipment to your account and will show up as “Inbound Transportation Charge. The shipping rates are set by weight and dimension (mostly dimensions).
Partnering with an Amazon carrier also makes the shipment to Amazon FBA experience a lot more convenient. They will provide you shipping labels that you can print out instantly. You may also cancel shipping up to 24 hours after approving the charges. If not canceled before 24 hours you will be charged shipment regardless if you send the inventory or not.
Next, you will need to print out those box labels. One box label will go inside the box and the other taped on top of the box.
Select Shipping Packing
This is where you tell Amazon if you will be sending in all your items in one box or multiple boxes.
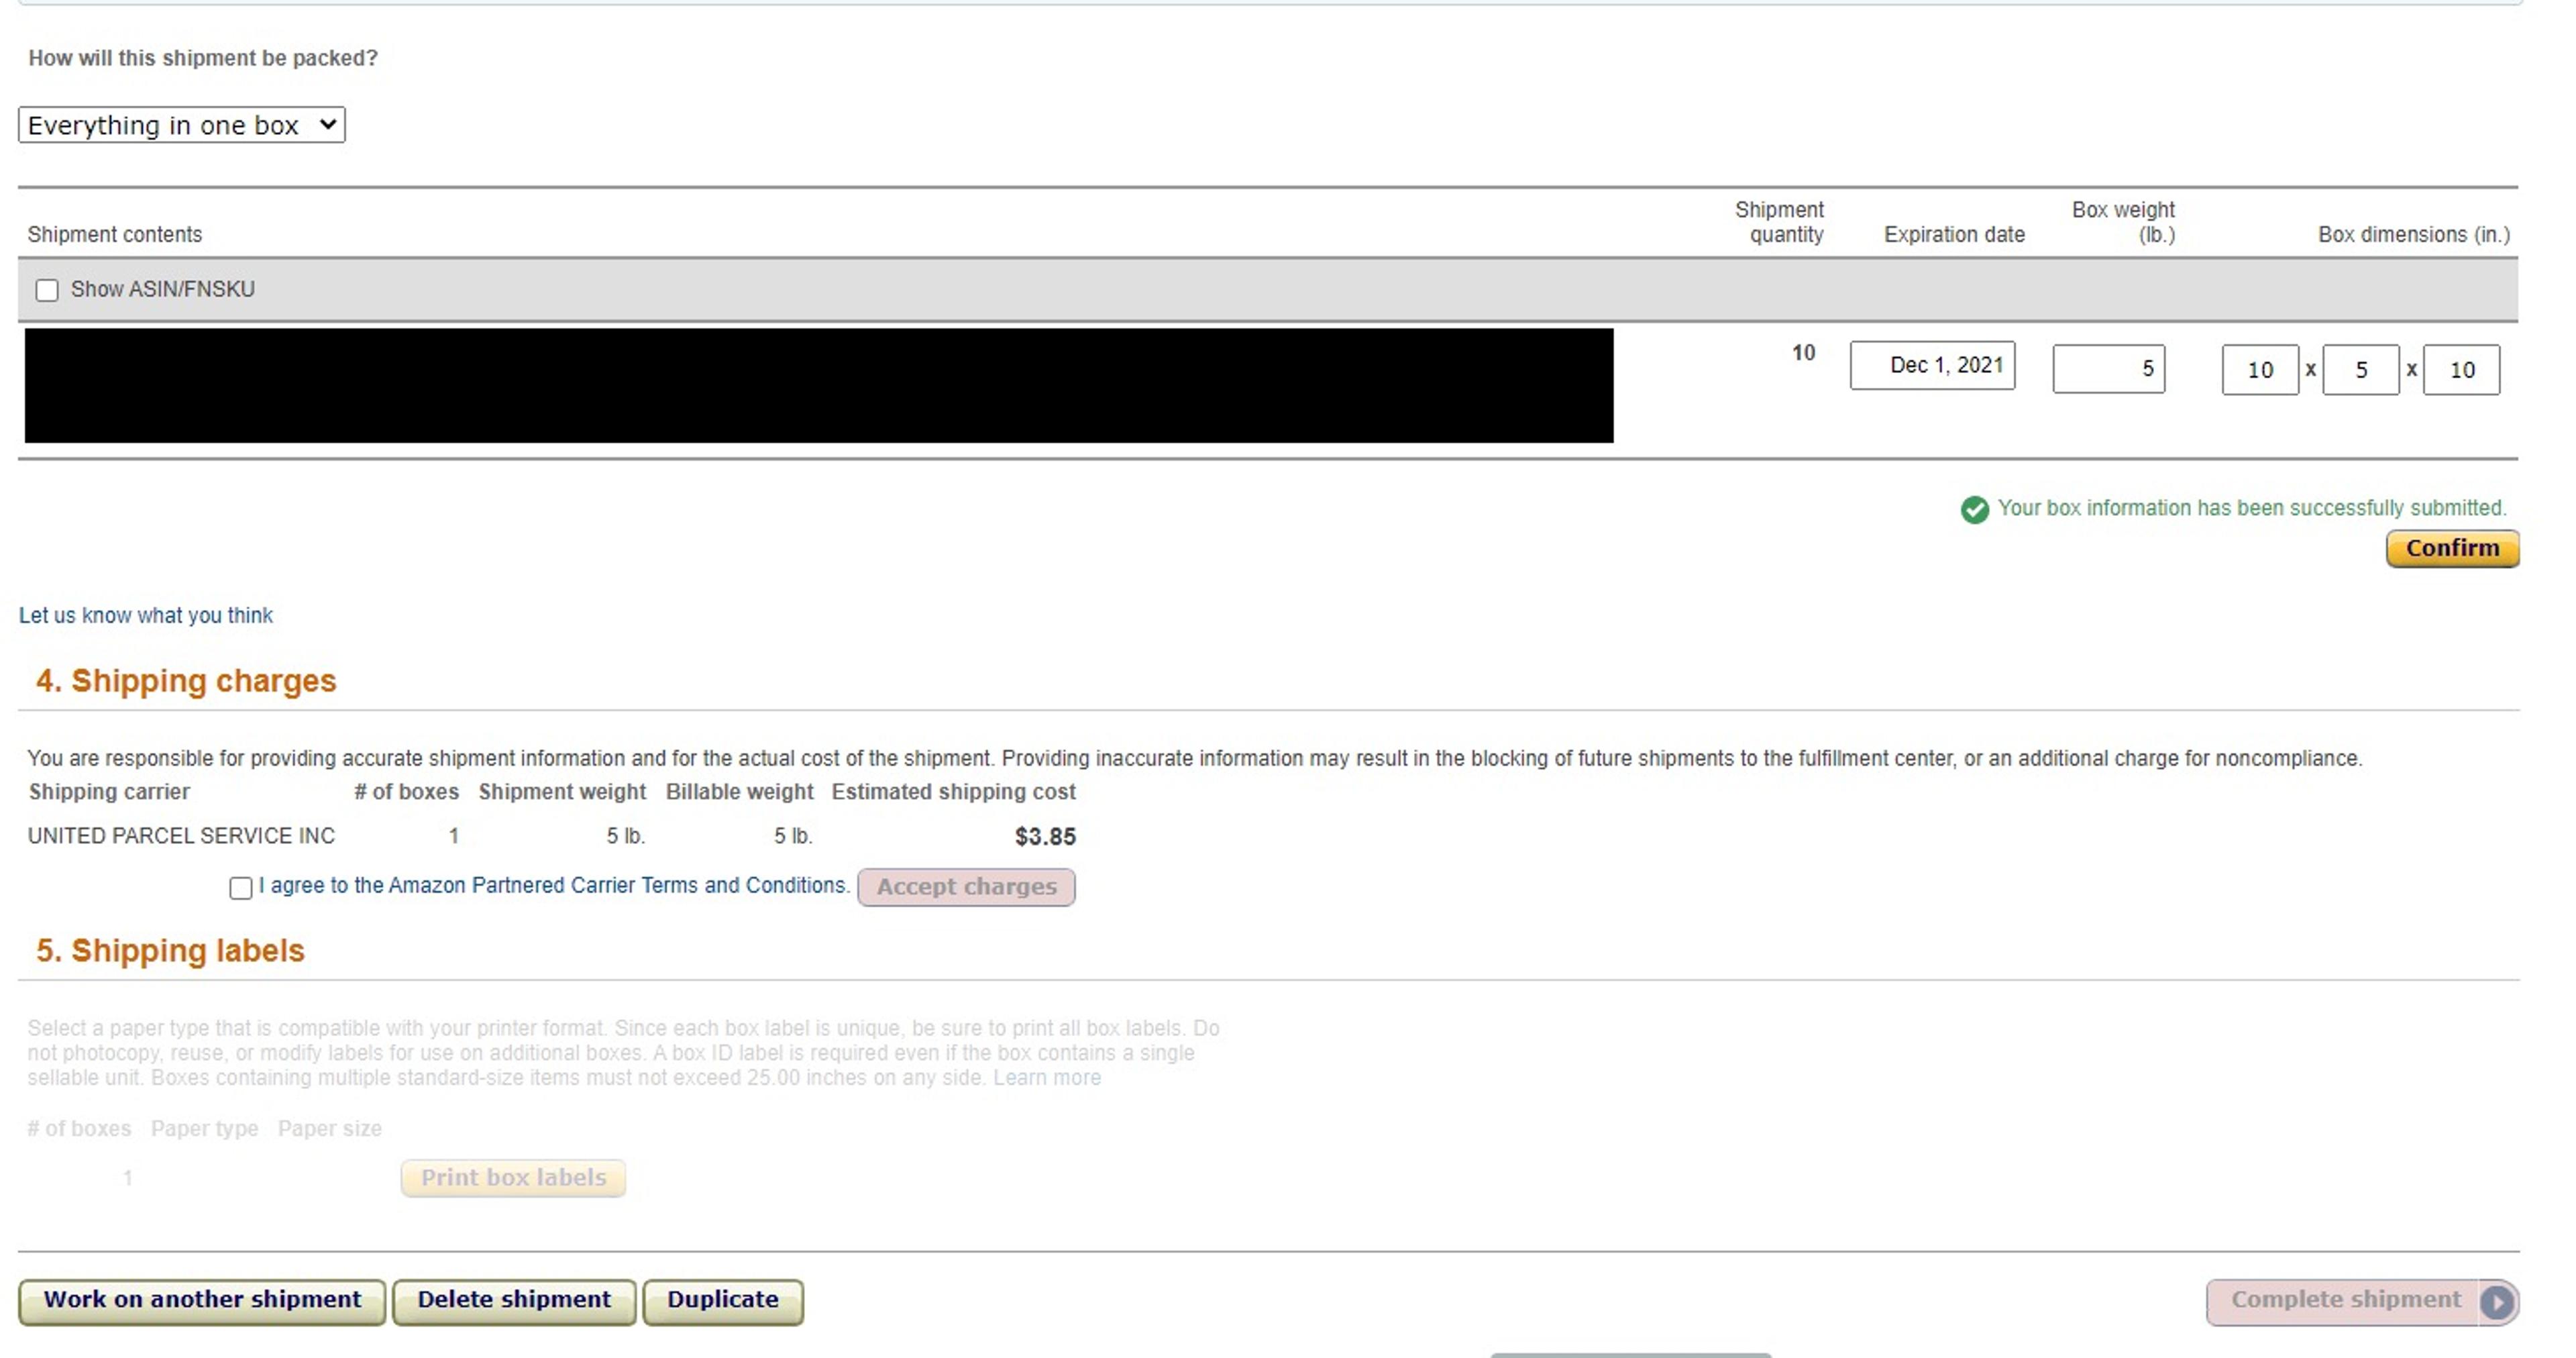
If you are shipping packages in multiple boxes you will need to give Amazon more information about which items will be in which boxes. You can fill out this information in a web spreadsheet form or upload a packing list. If you chose not to, you can opt to pay an Amazon manual processing fee.
Make sure you have your scale and tape measure handy. This is where you will need to report the weight and dimensions of each package. Avoid oversized boxes as they are extremely costly to warehouse and ship.
Quick Tips for Packing:
- Make sure there is very little extra space inside your boxes. In order to reduce extra space, add more packing paper, bubble wrap, or use a box cutter to resize the box.
- Keep Boxes under 50lbs, shoot for 45lbs
- Boxes cannot be above 25 inches long on any side unless the product is longer than 25 inches
For more information on shipment to Amazon FBA requirements visit the Amazon Seller Central page here.
After you complete your shipment, give your box to your scheduled pick-up driver or take the package to the local carrier drop-off site of your choice.
Last Thing To Consider
Storage Fees
Now that you are shipping FBA, you will be outsourcing the storage of your products to Amazon. This comes at a cost, a cost that oftentimes is overlooked and underestimated. Here is a breakdown of the storage fees to expect and account for.
Materials You May Need
We have compiled a list for you of all the things you may need when fulfilling shipment to Amazon FBA. Many of these items you may already have laying around your house. I recommend visiting your local Lowe’s as there are plenty of great deals to be found there; especially for packing materials.
- An accurate scale
- Air packing pillows
- Bubble wrap
- Packaging tape
- PLENTY of boxes - be sure to save your old Amazon boxes
- Polybags
- Good quality packing tape
- Opaque bags
- Box cutter or scissors
- Tape measure
- Goo Gone - to remove old labels
- Scotty Peeler - to remove old labels
- Good Labels